Preparation Time: 30 minutes
Autolyse Time: 1 hour
Bulk Fermentation: 4–6 hours
Cold Proof: 8–12 hours
Baking Time: 40–45 minutes
Total Time: Approximately 15–20 hours
Ingredients
For the Dough
- 500g bread flour
- 100g active sourdough starter (fed and bubbly)
- 300g fresh strawberries, diced
- 280g water
- 10g sea salt
- 20g honey (optional)
Optional Add-Ins
- 50g dried strawberries
- 30g white chocolate chips
- 1 teaspoon vanilla extract
- 1 tablespoon lemon zest
Equipment Needed
- Large mixing bowl
- Kitchen scale
- Dough scraper
- Banneton or proofing basket
- Dutch oven with lid
- Parchment paper
- Sharp bread lame or knife
Instructions
Step 1: Prepare the Strawberries
Wash and hull the strawberries thoroughly. Dice them into small pieces and place them on paper towels to absorb excess moisture. This helps prevent the dough from becoming overly wet during mixing.
If desired, lightly mash a small portion of the berries to release additional flavor throughout the loaf.
Step 2: Mix the Dough
In a large mixing bowl, combine the bread flour and water. Mix until no dry flour remains. Cover and allow the mixture to rest for 1 hour. This process, called autolyse, helps develop gluten naturally.
After the autolyse period, add the active sourdough starter, salt, and honey. Mix thoroughly until all ingredients are incorporated.
Gently fold in the diced strawberries and any optional add-ins.
The dough will feel slightly sticky due to the fruit’s moisture, which is completely normal.
Step 3: Bulk Fermentation
Cover the bowl and let the dough ferment at room temperature for 4 to 6 hours.
During the first 2 hours, perform a series of stretch-and-folds every 30 minutes:
- Grab one side of the dough.
- Stretch upward.
- Fold it over itself.
- Rotate the bowl and repeat four times.
Complete 4 sets of folds.
As fermentation progresses, the dough should become smoother, stronger, and noticeably puffier.
Step 4: Shape the Dough
Turn the fermented dough onto a lightly floured surface.
Using a dough scraper, gently shape it into a round loaf while preserving as much gas as possible.
Allow the dough to rest for 20 minutes.
Perform a final shaping, creating surface tension on the outside of the loaf.
Place the shaped dough seam-side up into a floured banneton or proofing basket.
Step 5: Cold Proof
Cover the basket and place it in the refrigerator for 8–12 hours.
This overnight proof develops deeper flavor, improves crust formation, and makes scoring easier before baking.
Step 6: Preheat the Oven
The next day, place a Dutch oven inside your oven and preheat to 475°F (245°C) for at least 45 minutes.
A thoroughly heated Dutch oven is essential for creating bakery-style oven spring and crust.
Step 7: Score and Bake
Carefully remove the dough from the refrigerator.
Turn it onto parchment paper.
Using a bread lame or sharp knife, score the top with one long slash or your preferred design.
Transfer the dough into the hot Dutch oven.
Cover with the lid and bake for 25 minutes.
Remove the lid and continue baking for 15–20 minutes until the crust becomes deep golden brown and the internal temperature reaches approximately 205°F (96°C).
Step 8: Cool Completely
Remove the bread from the Dutch oven and place it on a wire rack.
Allow the loaf to cool for at least 2 hours before slicing.
Cutting too soon can result in a gummy texture because the crumb continues setting as it cools.
Baker’s Tips for Success
- Use a strong, active sourdough starter for the best rise.
- Avoid overly ripe strawberries that contain excessive moisture.
- If the dough feels too wet, add 10–20g additional flour during mixing.
- Refrigerated proofing greatly improves flavor complexity.
- For sweeter bread, increase honey to 30g.
Serving Suggestions
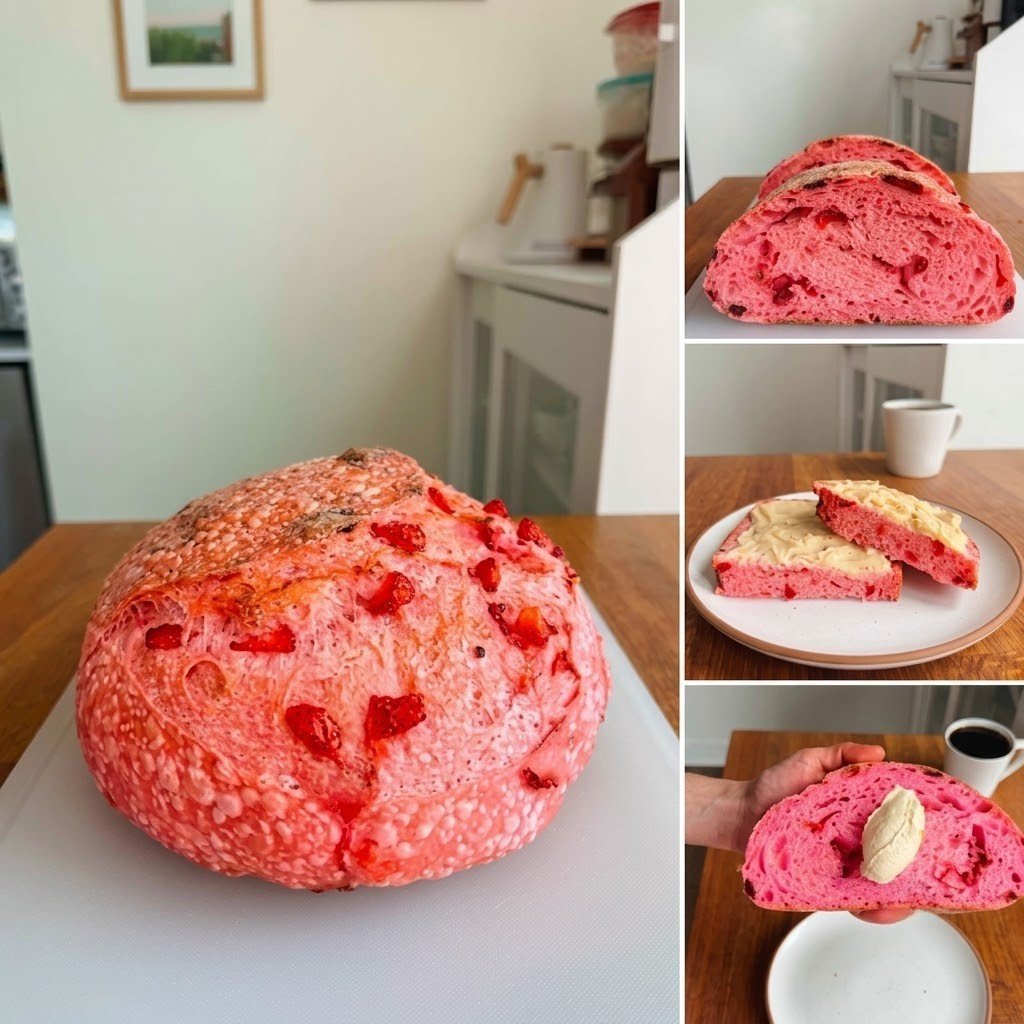
This Strawberry Sourdough Bread pairs beautifully with:
- Salted butter
- Cream cheese
- Strawberry jam
- Honey
- Mascarpone cheese
- Nutella
- Greek yogurt
- Fresh fruit
It also makes exceptional French toast and breakfast sandwiches.
Storage Instructions
Store the loaf in a bread box or airtight container at room temperature for up to 3 days.
For longer storage:
- Refrigerate for up to 1 week.
- Freeze sliced portions for up to 3 months.
To refresh the bread, warm slices in a toaster or oven for a few minutes before serving.
Nutrition Information
Per Slice (Based on 12 Slices)
- Calories: 165
- Carbohydrates: 32g
- Protein: 5g
- Fat: 1g
- Saturated Fat: 0g
- Fiber: 2g
- Sugar: 4g
- Sodium: 195mg
- Potassium: 95mg
- Calcium: 12mg
- Iron: 1.3mg