Preparation Time: 30 minutes
First Rise (Bulk Fermentation): 6–8 hours
Second Rise (Proofing): 2–3 hours
Baking Time: 40–45 minutes
Total Time: Approximately 10–12 hours
Difficulty Level: Intermediate
Cuisine: American
Ingredients
For the Dough
500g bread flour (about 4 cups)
100g active sourdough starter (½ cup)
300g warm water (1¼ cups)
30g unsalted butter, softened (2 tablespoons)
25g granulated sugar (2 tablespoons)
10g fine sea salt (2 teaspoons)
Optional Topping
Melted butter for brushing
Rolled oats or sesame seeds for garnish
Equipment Needed
9×5-inch loaf pan
Large mixing bowl
Kitchen scale
Dough scraper
Clean kitchen towel or plastic wrap
Cooling rack
Instructions
Step 1: Mix the Dough
In a large mixing bowl, combine the active sourdough starter and warm water. Stir until the starter is mostly dissolved.
Add the bread flour, sugar, softened butter, and salt. Mix until a shaggy dough forms and no dry flour remains. The dough will appear slightly sticky, which is perfectly normal.
Cover the bowl and let the dough rest for 30 minutes. This resting period helps hydrate the flour and improves gluten development.
Step 2: Knead the Dough
Transfer the dough to a lightly floured surface.
Knead for 8–10 minutes until the dough becomes smooth, elastic, and slightly tacky. If using a stand mixer, knead on medium speed for about 6 minutes.
The dough should pass the windowpane test, meaning you can stretch a small piece thin enough to see light through it without tearing.
Step 3: Bulk Fermentation
Place the dough in a lightly greased bowl and cover.
Allow it to ferment at room temperature (70–75°F / 21–24°C) for 6–8 hours.
During the first 2 hours, perform 3 sets of stretch-and-folds every 30 minutes. This strengthens the dough and improves structure.
By the end of fermentation, the dough should increase in volume by approximately 50–75% and feel airy and puffy.
Step 4: Shape the Loaf
Turn the dough onto a lightly floured work surface.
Gently flatten it into a rectangle. Fold the sides toward the center and roll the dough tightly into a log shape.
Pinch the seam closed and place the dough seam-side down into a greased 9×5-inch loaf pan.
Proper shaping creates the characteristic sandwich loaf structure and helps achieve an even crumb.
Step 5: Final Proof
Cover the loaf pan loosely with plastic wrap or a clean towel.
Allow the dough to proof for 2–3 hours, or until it rises about 1 inch above the rim of the pan.
The exact proofing time will depend on room temperature and starter strength.
To test readiness, gently press the dough with a finger. If the indentation springs back slowly, the loaf is ready to bake.
Step 6: Bake
Preheat your oven to 375°F (190°C).
Place the loaf on the center rack and bake for 40–45 minutes.
The bread should develop a rich golden-brown color and reach an internal temperature of 200–205°F (93–96°C).
If the top begins browning too quickly, loosely tent it with aluminum foil during the final 15 minutes of baking.
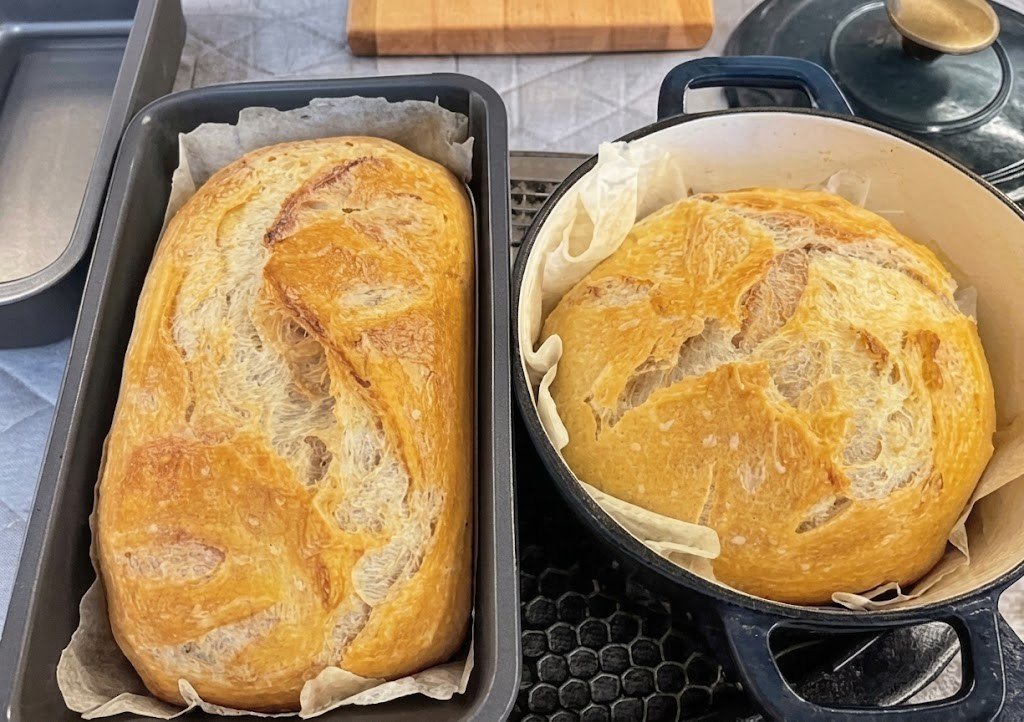
Step 7: Cool Completely
Remove the loaf from the pan immediately after baking.
Transfer it to a wire rack and allow it to cool completely for at least 1 hour before slicing.
Cooling is essential because the crumb continues setting during this time. Cutting too early can result in a gummy texture.
Expert Tips for Success
Use an Active Starter
Your sourdough starter should be bubbly, doubled in size, and recently fed. A weak starter can lead to poor rise and dense bread.
Measure by Weight
Using a kitchen scale provides more accurate results than measuring cups and helps ensure consistent hydration.
Avoid Overproofing
An overproofed loaf may collapse during baking. Watch the dough carefully rather than relying solely on timing.
For a Softer Crust
Brush the top with melted butter immediately after baking. This creates a soft, tender crust ideal for sandwiches.
Storage Tips
Store the cooled loaf in an airtight container or bread bag at room temperature for up to 4 days.
For longer storage, slice and freeze for up to 3 months. Toast frozen slices directly from the freezer.
Serving Suggestions
This sourdough sandwich loaf is incredibly versatile and pairs well with a variety of meals.
Try it:
Toasted with butter and jam
For turkey or chicken sandwiches
As grilled cheese bread
For French toast
Alongside soups and stews
As avocado toast
For homemade garlic bread
Its soft texture and mild sourdough flavor make it suitable for both sweet and savory toppings.
Frequently Asked Questions
Can I make this loaf overnight?
Yes. After shaping, place the loaf pan in the refrigerator and allow it to proof overnight. Bake directly from the refrigerator the next morning.
Why is my loaf dense?
Common causes include an inactive starter, insufficient fermentation, or under-kneading.
Can I use all-purpose flour?
Yes, but bread flour produces better gluten development and a higher rise.
How do I know when the bread is fully baked?
The internal temperature should reach 200–205°F (93–96°C), and the loaf should sound hollow when tapped on the bottom.
Nutrition Information
Per Serving (1 Slice, based on 12 slices per loaf)
Calories: 165
Total Fat: 2g
Saturated Fat: 1g
Cholesterol: 5mg
Sodium: 190mg
Total Carbohydrates: 31g
Dietary Fiber: 1g
Sugars: 2g
Protein: 5g
Calcium: 12mg
Iron: 2mg
Potassium: 65mg