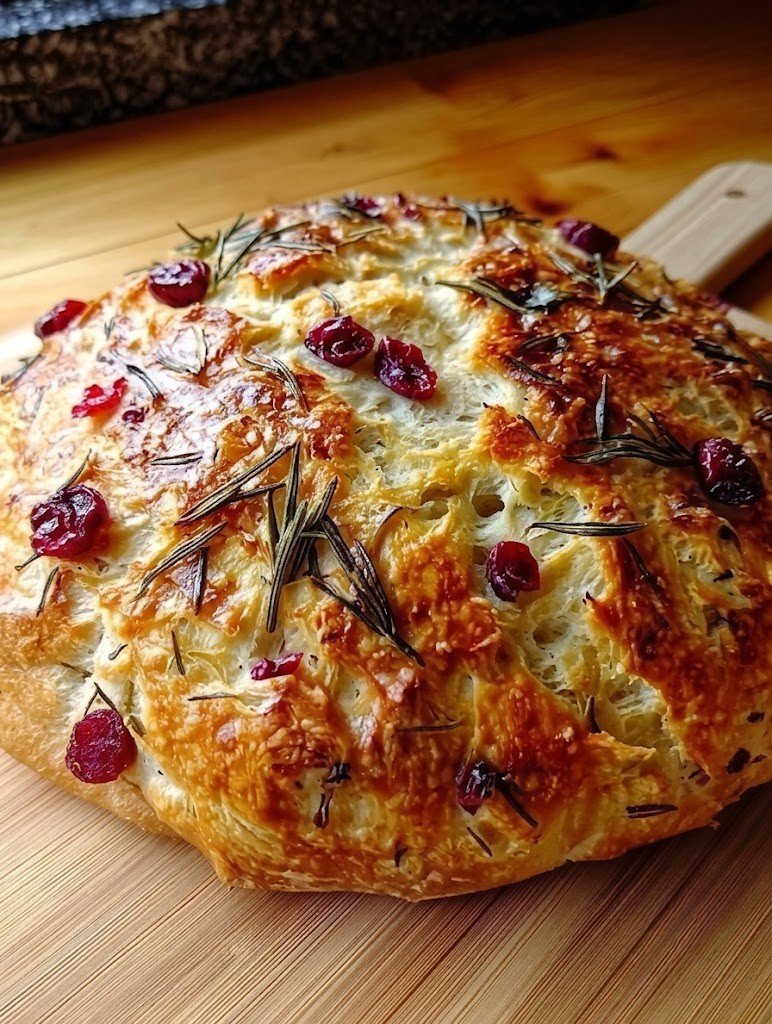
- Preparation Time: 10 minutes
- Resting/Rising Time: 12–18 hours
- Second Rise: 30–60 minutes
- Cooking Time: 45 minutes
- Total Time: Approximately 13–19 hours
- Servings: 8 slices
- Calories: Approximately 170 calories per slice
Ingredients
- 3 cups all-purpose flour
- 1½ teaspoons salt
- ½ teaspoon instant yeast
- 1½ cups warm water
- 1 tablespoon cornmeal or flour for dusting (optional)
Equipment
- Large mixing bowl
- Wooden spoon or spatula
- Plastic wrap or clean kitchen towel
- Dutch oven with lid
- Parchment paper
- Cooling rack
Instructions
Step 1: Mix the Dough
In a large mixing bowl, combine the flour, salt, and instant yeast. Stir until evenly mixed.
Pour the warm water into the dry ingredients and stir with a wooden spoon until all the flour is incorporated. The dough will look wet, sticky, and shaggy. This is exactly how it should look. Do not add extra flour or attempt to knead the dough.
Cover the bowl tightly with plastic wrap or a clean kitchen towel.
Step 2: Let the Dough Rise
Allow the dough to rest at room temperature for 12 to 18 hours. During this time, the yeast slowly ferments the dough, creating air bubbles and developing a rich, slightly tangy flavor.
The dough is ready when it has doubled in size and the surface is covered with bubbles.
Step 3: Shape the Dough
Lightly flour your work surface and gently scrape the dough onto it.
Using floured hands, fold the edges of the dough toward the center a few times to create a rough ball. Avoid pressing or kneading the dough, as you want to preserve the air pockets.
Place the dough on a sheet of parchment paper dusted with flour or cornmeal.
Cover loosely with a towel and let it rise for another 30 to 60 minutes.
Step 4: Preheat the Oven
About 30 minutes before baking, place your Dutch oven with its lid inside the oven.
Preheat the oven to 450°F (230°C). Heating the Dutch oven creates steam during baking, producing a crisp, bakery-style crust.
Step 5: Bake the Bread
Carefully remove the hot Dutch oven from the oven.
Using the parchment paper, lift the dough and lower it into the hot pot. Cover immediately with the lid.
Bake for 30 minutes with the lid on.
Remove the lid and continue baking for 15 minutes, or until the crust becomes deep golden brown.
The bread should sound hollow when tapped on the bottom.
Step 6: Cool Before Slicing
Transfer the bread to a cooling rack.
Allow it to cool for at least one hour before slicing. Cutting too early can result in a gummy texture because the interior is still finishing the cooking process.
Tips for Success
- Measure the flour accurately using the spoon-and-level method.
- Do not rush the long fermentation. The extended resting time develops flavor and texture naturally.
- Sticky dough is normal. Resist the temptation to add extra flour.
- A Dutch oven is highly recommended because it traps steam, helping create a crunchy artisan crust.
- Store leftover bread in a paper bag or wrapped loosely in a clean towel to maintain the crust.
- Freeze sliced bread for up to three months for easy reheating.
Flavor Variations
This recipe can easily be customized.
Try adding:
- Fresh rosemary and minced garlic
- Shredded cheddar cheese
- Parmesan and Italian herbs
- Chopped olives
- Sun-dried tomatoes
- Everything bagel seasoning
- Cracked black pepper
- Dried cranberries and walnuts
Simply mix your chosen ingredients into the dough before the first rise.
Serving Suggestions
No-knead yeast bread pairs wonderfully with many meals.
Serve it with:
- Vegetable soup
- Tomato soup
- Beef stew
- Chicken noodle soup
- Olive oil and balsamic vinegar
- Garlic butter
- Avocado toast
- Breakfast eggs
- Sandwiches
- Toast with honey or jam
Its crisp crust and soft interior make it suitable for nearly any meal.
Storage Instructions
Store cooled bread in an airtight container or bread bag at room temperature for up to three days.
For longer storage, slice the loaf and freeze individual pieces in freezer-safe bags for up to three months.
Reheat frozen slices directly in a toaster or warm them in the oven for a freshly baked taste.
Why You’ll Love This Recipe
- No kneading required
- Beginner-friendly
- Uses simple pantry ingredients
- Crispy artisan crust
- Soft and airy interior
- Excellent flavor from slow fermentation
- Perfect for sandwiches, soups, and breakfast
- Budget-friendly homemade bread
- Easy to customize with herbs and cheese
Nutrition Information (Per Slice)
- Calories: 170
- Total Fat: 0.8 g
- Saturated Fat: 0.1 g
- Cholesterol: 0 mg
- Sodium: 440 mg
- Carbohydrates: 35 g
- Dietary Fiber: 1.5 g
- Sugars: 0.3 g
- Protein: 5 g
- Calcium: 8 mg
- Iron: 2 mg
- Potassium: 55 mg