web tracker

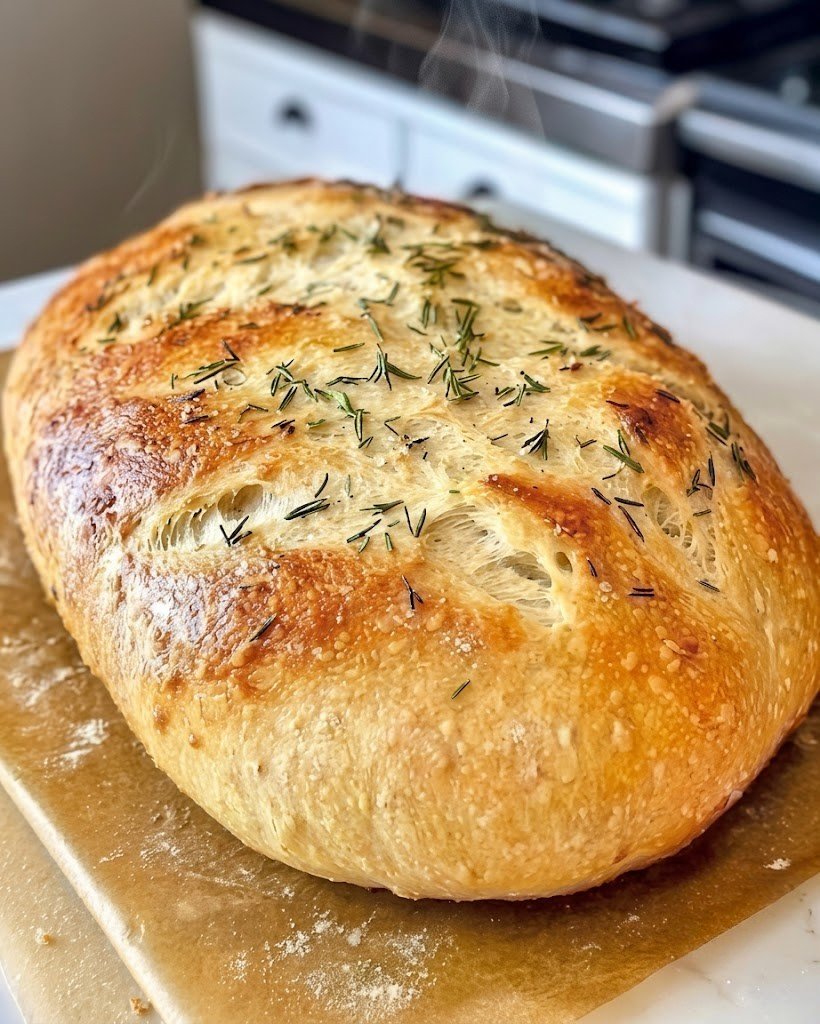
No-Knead Rosemary Garlic Artisan Bread.

  • Prep Time: 15 minutes

  • Rest/Rise Time: 12 to 18 hours (overnight) + 30 minutes second rise

  • Bake Time: 45 minutes

  • Total Active Time: 25 minutes

  • Yield: 1 round boule (approx. 8 slices)

  • Recipe Difficulty: Easy (Beginner Friendly)

  • Baking Intensity: High Heat (450°F / 230°C)

Key Ingredients

  • 400g (3 ¼ cups) All-Purpose or Bread Flour: Bread flour yields a slightly chewier structure, while all-purpose gives a lighter, tender crumb.

  • 2 tsp Fine Sea Salt or Kosher Salt: Crucial for both flavor and controlling yeast activity.

  • ½ tsp Active Dry Yeast or Instant Yeast: A minimal amount of yeast works slowly over a long fermentation period to build complex flavors.

  • 1 ½ cups (360ml) Warm Water: Aim for lukewarm water around 100°F–105°F (38°C–40°C).

  • 2 tbsp Fresh Rosemary: Finely chopped. Fresh rosemary works significantly better than dried for vibrant flavor.

  • 1 Head of Garlic (or 4–5 cloves minced): Roasted whole garlic cloves offer a subtle, sweet garlic flavor throughout the loaf.

  • 1 tbsp Extra Virgin Olive Oil: To coat the garlic and add moisture to the dough.

Baking Equipment Required

  1. Heavy Dutch Oven (4.5 to 6 quart): Cast iron or enameled cast iron with a tight-fitting lid is essential. It traps steam, mimicking commercial deck ovens to produce a thick, crispy crust.

  2. Parchment Paper: Makes transferring the wet, sticky dough into the scorching-hot pot safe and effortless.

  3. Large Mixing Bowl: Glass or ceramic works best for long fermentation.

  4. Plastic Wrap or Bowl Cover: Keeps moisture locked in during the overnight rise.

Step-by-Step Instructions

1.Roast the Garlic:Active: 5 min | Passive: 35 min.

Preheat your oven to 400°F (200°C). Slice off the top ¼ inch of the garlic head to expose the cloves. Drizzle with 1 tablespoon of olive oil, wrap tightly in aluminum foil, and bake for 35–40 minutes until soft, golden, and sweet. Let it cool, then squeeze the roasted cloves out of their skins into a small bowl and mash lightly.

2.Mix the Dry Ingredients & Aromatics:Active: 5 min.

In a large mixing bowl, whisk together the flour, salt, active dry yeast, and finely chopped fresh rosemary. Add the cooled mashed roasted garlic into the dry mixture, distributing it gently.

3.Combine Water & Form Shaggy Dough:Active: 5 min.

Pour the lukewarm water into the bowl. Using a wooden spoon or a dough whisk, stir until a wet, shaggy, sticky mass forms with no dry flour pockets remaining. Do not knead! The dough will look messy and loose—that is expected for high-hydration loaves.

4.Overnight Fermentation (First Rise):Passive: 12–18 hours.

Cover the bowl tightly with plastic wrap or a damp kitchen towel. Place it in a draft-free spot at room temperature (68°F–72°F) for 12 to 18 hours. During this rest period, enzymes and yeast naturally form gluten networks. The dough will double in size, bubble on the surface, and smell deliciously tangy.

5.Preheat Oven & Dutch Oven:Passive: 30 min.

30 minutes before baking, place your empty Dutch oven (with its lid on) on the center rack of your oven. Preheat to 450°F (230°C). Preheating the cast iron ensures maximum heat transfer for “oven spring” (the initial dramatic rise).

6.Shape the Dough:Active: 5 min | Passive: 30 min.

Scrape the sticky dough out onto a generously floured piece of parchment paper. Using floured hands, gently fold the edges toward the center to form a loose, smooth ball. Dust the top with a bit of flour, cover lightly with a towel, and let it rest for 30 minutes while the oven finishes preheating.

7.Bake Covered (Steam Phase):Intensity: High | Time: 30 min.

Carefully remove the blazing hot Dutch oven from the oven using heavy oven mitts. Use the parchment paper corners as handles to lift the dough ball and lower it directly into the hot pot. Place the lid back on and return it to the oven. Bake covered for 30 minutes. The trapped steam keeps the crust soft initially, allowing the bread to expand fully.

8.Bake Uncovered (Crust Phase):Intensity: High | Time: 15 min.

Remove the lid from the Dutch oven. You will see a pale, expanded loaf. Bake uncovered for an additional 12 to 15 minutes until the crust transforms into a rich, deep mahogany-gold color and sounds hollow when tapped on the bottom.

9.Cool Completely:Passive: 1 hour.

Transfer the loaf using the parchment paper to a wire cooling rack. Allow the bread to cool for at least 45 to 60 minutes before slicing. Cutting into warm bread prematurely traps internal steam, resulting in a gummy texture.


Baker’s Tips for Success

Hydration Notice: Depending on humidity and flour brand, if your dough feels overly dry during step 3, add 1 extra tablespoon of water at a time. The dough should be wet and sticky, not firm like traditional pizza dough.

  • Fresh vs. Dried Herbs: Fresh rosemary holds up better to high heat without scorching or turning bitter.

  • Slicing Tool: Always use a sharp, serrated bread knife in a gentle sawing motion to preserve the open crumb structure.

  • Storage: Store cut-side down on a wooden cutting board for 2 days to maintain crustiness, or seal in a paper bag. Avoid plastic bags, which soften the crust.

Nutritional Information

Nutrition estimated per serving based on 1 slice (1/8th of loaf).

Nutrient Amount Per Serving % Daily Value*
Calories 215 kcal
Total Fat 2.2g 3%
Saturated Fat 0.3g 2%
Sodium 440mg 19%
Total Carbohydrates 41g 15%
Dietary Fiber 2g 7%
Sugars 0.5g
Protein 6.5g 13%
Calcium 15mg 1%
Iron 2.4mg 13%

Leave a Comment