| Metric | Detail |
| Active Prep Time | 45 Minutes (spread over several hours) |
| Bulk Fermentation | 4–6 Hours (depending on environment) |
| Cold Proof | 12–24 Hours (recommended for flavor/schedule) |
| Total Time | 20–32 Hours (mostly passive) |
| Bake Intensity | Medium (requires attentive temperature and timing) |
| Recipe Difficulty | Intermediate |
| Yield | 1 large boule (round loaf) |
Key Equipment
-
Large Mixing Bowl (glass or ceramic preferred)
-
A Reliable Kitchen Scale (Crucial for precision and consistent results)
-
Plastic Wrap or Bowl Covers
-
Banneton (Proofing Basket), 9-inch round. Alternatively, a bowl lined with a well-floured towel.
-
Bench Knife (for shaping and handling dough)
-
Lame or Sharp Razor Blade (for scoring)
-
Dutch Oven or Combo Cooker, 5-7 quart (Essential for trapping steam)
-
Oven Mitts (High heat resistant)
-
Cooling Rack
Ingredients (by weight)
-
90g (18%) Active, Ripe Sourdough Starter (fed with 1:1:1 flour:water ratio and at its peak)
-
360g (72%) High-Protein Bread Flour (unbleached)
-
40g (8%) Whole Wheat Flour or Rye Flour (optional, adds complex flavor and color)
-
275g (55%) Water (filtered, 75°F – 80°F / 24°C – 27°C)
-
9g (1.8%) Fine Sea Salt
Step-by-Step Instructions
Phase 1: The Pre-Game (Day 1, Morning)
-
Starter Feeding (Low Intensity): In the morning, ensure your sourdough starter is active. Feed it 1:1:1 (by weight, e.g., 30g starter + 30g water + 30g flour). Let it ferment at warm room temperature (around 72°F / 22°C) until it is visibly bubbly, light, smells yeastily-sour, and is at its peak height (usually 4-6 hours, sometimes less for well-fed starters). It should easily pass the float test (a small scoop of starter floats in a cup of water).
Phase 2: Building Strength (Day 1, Afternoon)
-
Autolyse (Low Intensity | 30 Minutes): In a large bowl, whisk together the bread flour and whole wheat/rye flour. Add 260g of the warm water. Mix with your hands until all flour is hydrated and a shaggy, lumpy mass forms (the “shaggy mass” should look not dissimilar to the initial texture in image_9.png). Do not add salt or starter yet. Cover the bowl tightly and let it rest for 30 minutes. This hydrates the flour and allows natural gluten development.
-
Add Starter & Salt (Medium Intensity): When the autolyse is done, spoon the ripe starter (90g) over the dough. Dimple it in. In a small bowl, dissolve the sea salt (9g) in the remaining 15g of water. Pour this salt solution over the dough and starter. Mix everything together by pinching and squeezing the dough through your fingers until the starter and salt water are fully incorporated and the dough feels smooth and elastic. This should take 3-5 minutes.
-
Bulk Fermentation & Stretch and Folds (Medium Intensity | 3–4 Hours): This is where we develop the gluten network and traps air.
-
Fold 1 (Minute 30): Lift the edge of the dough, stretch it upward, and fold it over the center. Rotate the bowl 90 degrees and repeat three more times. Cover and let rest.
-
Fold 2 (Minute 60): Perform another set of four folds. By now, the dough should feel stronger and smoother than the simple mixing phase seen in image_9.png. Cover.
-
Fold 3 (Minute 90): Another full set of folds. The dough should show significant resistance. Cover.
-
Fold 4 (Minute 120): Perform the final set of stretch and folds. The dough should be robust.
-
-
Bulk Rise (Passive Time | 2–3 Hours): After the final fold, let the dough rest, covered, in a warm spot (ideally 75°F / 24°C). The total bulk fermentation time is 4–6 hours from the time you added the starter. We are looking for the dough to increase in volume by 30-50% (NOT double), look light, domed, and have a few visible bubbles on the surface.
Phase 3: Shape and Proof (Day 1, Evening)
-
Pre-Shape (Low Intensity): Turn the risen dough out onto a lightly floured surface. Using a bench knife, gently fold the edges into the center to form a loose, round ball. Flip it over and let it rest, bench-side down, for 15-20 minutes, covered loosely.
-
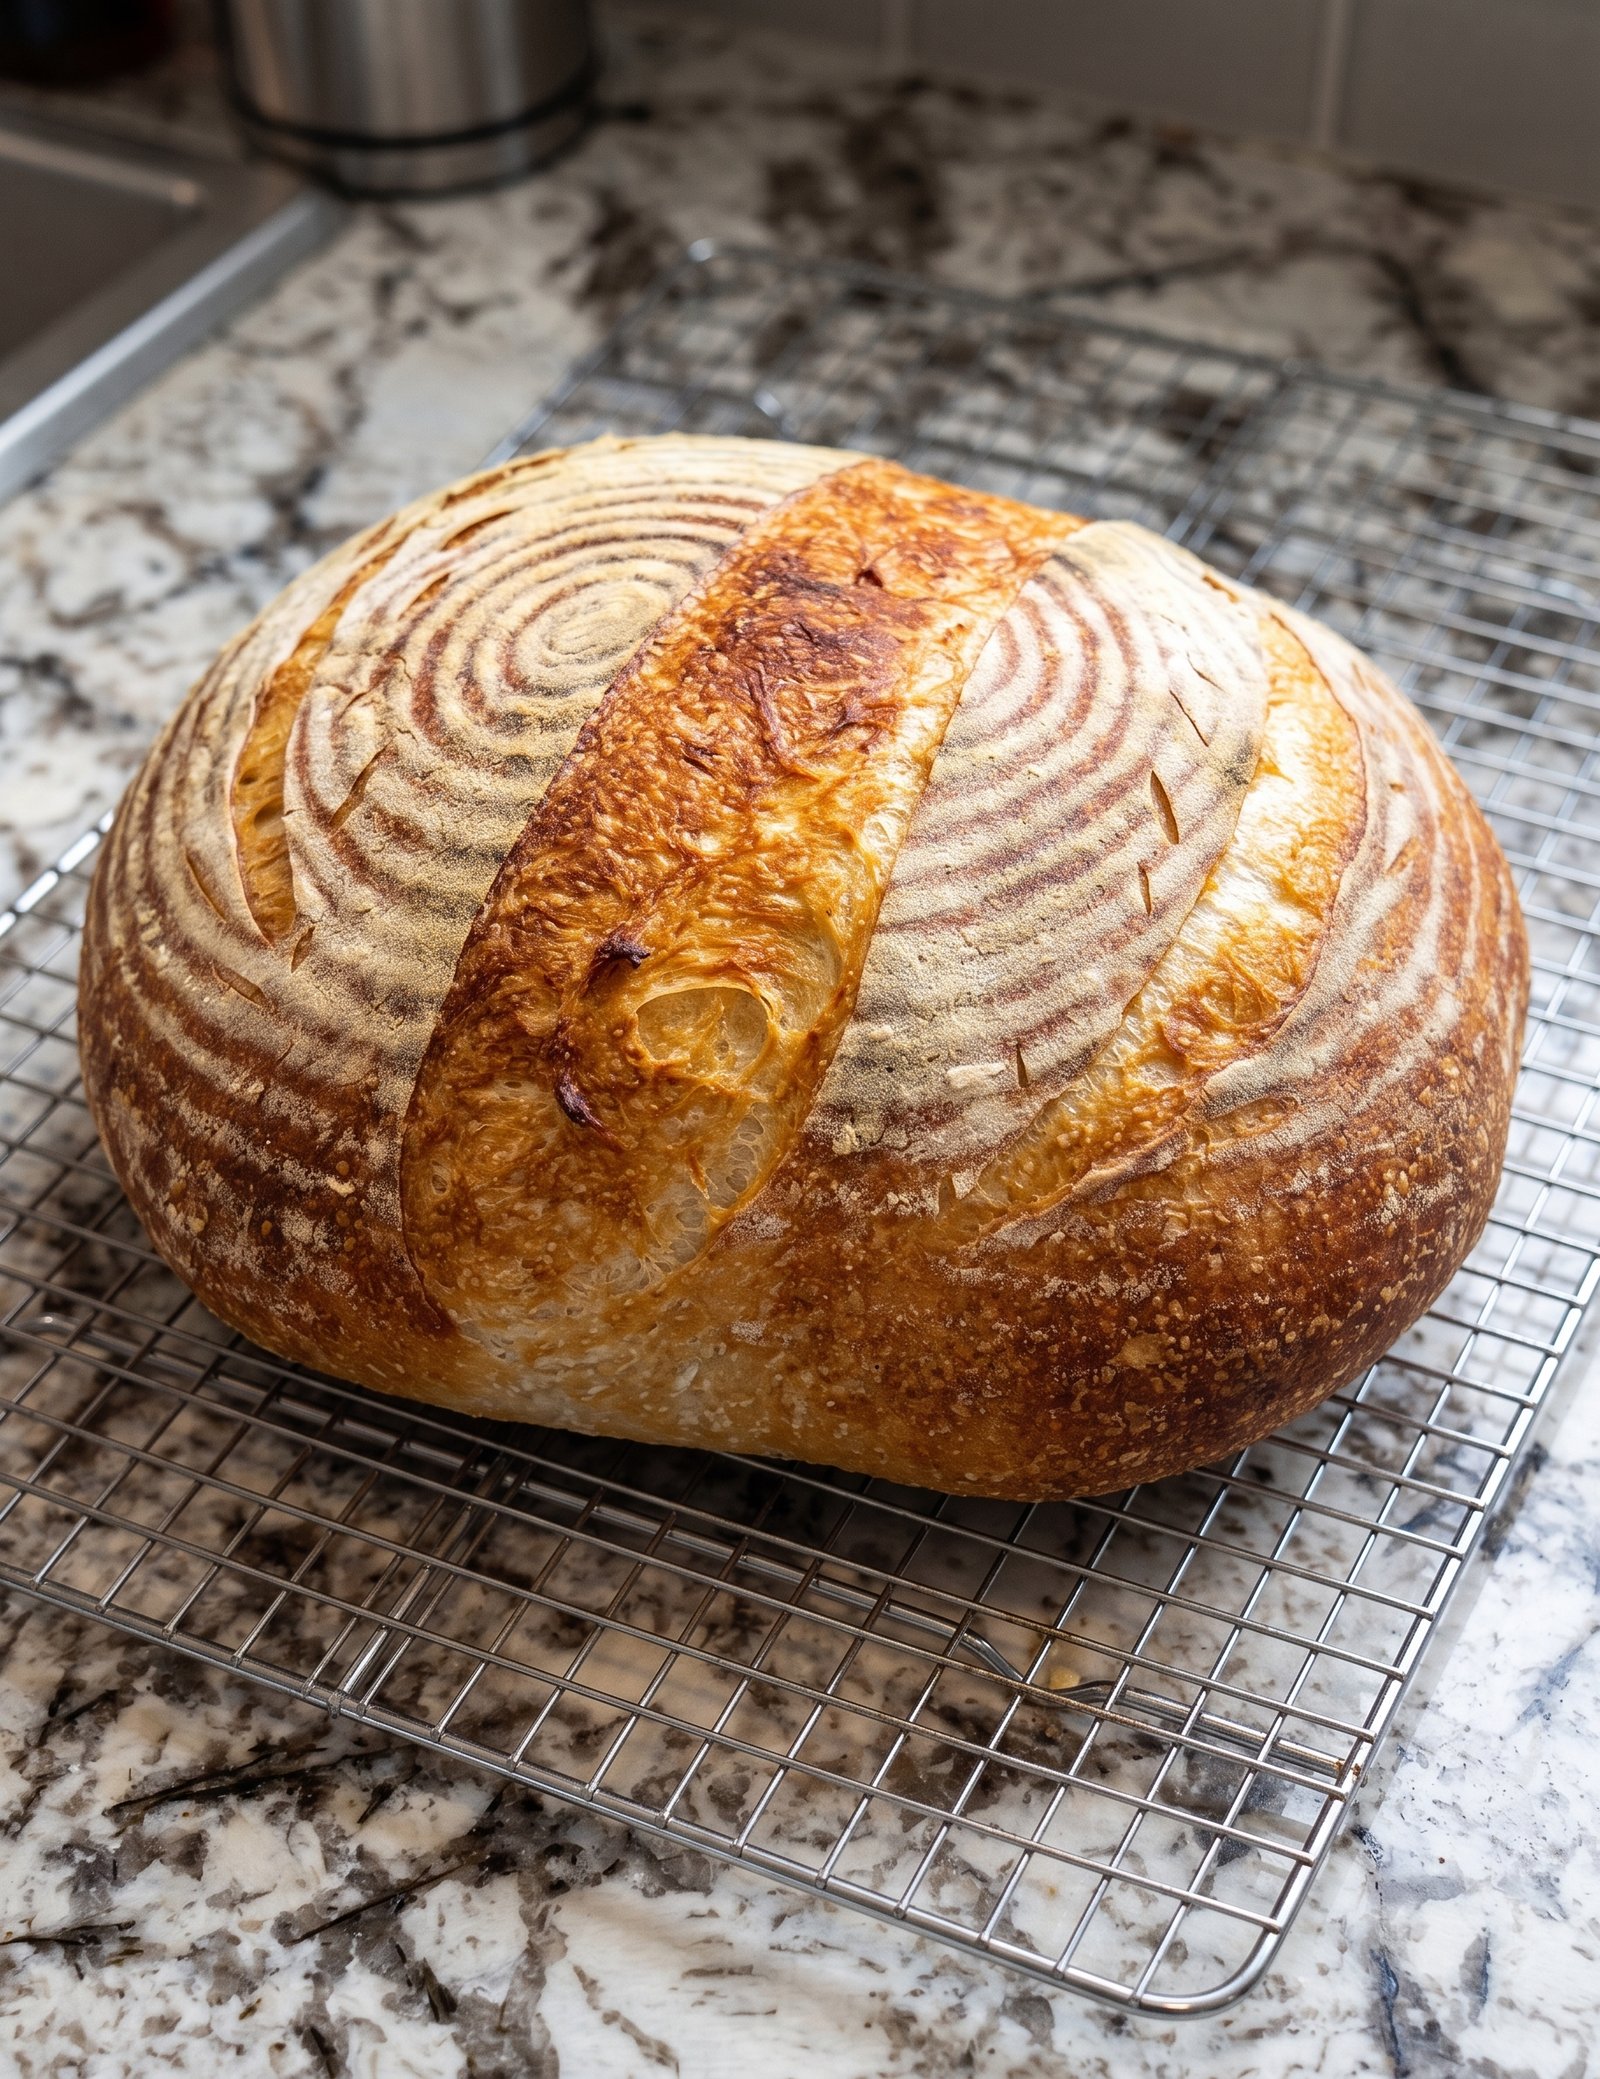
Final Shape (Medium Intensity): Dust your 9-inch banneton generously with rice flour or a mix of bread flour and rice flour. Lightly flour the work surface. Flip the dough ball over. Gently stretch the sides and fold them in, following your preferred method (suture technique or standard envelope fold) to create tension and a smooth outer skin. Aim for a tight shape like the loaf in image_9.png. Place the shaped dough into the banneton, seam-side up.
-
Cold Fermentation / Cold Proof (Passive Time | 12–24 Hours): Cover the banneton (use a plastic bag or reusable cover). Transfer the banneton directly to the refrigerator (around 38°F / 3°C) and let it proof slowly overnight. This slows the yeast activity, develops complex flavors, and firms up the dough, making it much easier to score the next day.
Phase 4: Bake (Day 2)
-
Preheat (Low Heat Intensity | 60 Minutes): On bake day, place your Dutch oven (with lid) on the center rack of your oven and preheat to 500°F (260°C) for at least 60 minutes. We want that heavy pot screaming hot.
-
Turn Out & Score (Moderate Intensity): Remove the cold dough from the fridge. Cut a piece of parchment paper slightly larger than your banneton. Place the parchment over the banneton and carefully turn the dough out. Peel off the proofing basket. The cold dough should hold its shape. With a razor blade or lame, make your signature scores (e.g., the decorative spiral patterns seen in image_9.png). Be decisive; cut with a slight angle and about 1/4 inch deep.
-
Bake with Steam (High Heat Intensity): Carefully, using heavy-duty oven mitts, remove the screaming hot Dutch oven lid. Holding the edges of the parchment paper, lower the dough into the pot. Pour 1 tablespoon of water onto the parchment outside the dough (creating extra steam). Immediately replace the lid and put the entire pot back into the oven. Reduce the oven temperature to 450°F (232°C). Bake for 20 minutes with the lid on. This traps steam and allows the loaf to achieve massive oven spring without the crust setting early.
-
Bake for Color (High Heat Intensity): Remove the lid. Be wowed by the initial spring and color! Continue baking at 450°F (232°C) for another 20–25 minutes, with the lid off, until the loaf is a deep, dark golden amber and achieves the caramelized, textured crust (just like the beautiful bake in image_9.png).
-
Cool (Crucial Passive Time | 2+ Hours): This is the hardest part. Carefully remove the hot loaf from the Dutch oven and transfer it to a wire cooling rack. Allow the bread to cool completely, for at least 2 hours. If you slice a hot loaf, the internal steam rushes out, turning the crumb gummy. Let the bread finish cooking internally and set properly. This achieves the desired artisanal texture.
Nutritional Information (Per Slice)
Note: Calculations are estimates based on standard artisanal ingredients and slicing.
| Nutrient | Amount Per Serving |
| Calories | 165 kcal |
| Total Fat | 0.5g |
| Saturated Fat | 0.1g |
| Total Carbohydrates | 33g |
| Dietary Fiber | 2g |
| Total Sugars | 0.5g |
| Protein | 6g |
| Sodium | 350mg |