-
Prep time: 30 minutes (active mixing and folding)
-
Bulk Fermentation (Rise): 5 to 6 hours (at an ambient room temperature of around 72°F / 22°C)
-
Proofing (Second Rise): 1 to 1.5 hours (in the skillet)
-
Cook time: 25 to 30 minutes
-
Total time: Approximately 8 hours from start to finish
-
Skill Level: Intermediate (Requires understanding of sourdough starter strength and gluten development)
-
Yields: One 10-inch or 12-inch round focaccia (6-8 servings)
Equipment Needed
-
10-inch or 12-inch Cast-Iron Skillet: This is non-negotiable for the crispy crust.
-
Digital Kitchen Scale: Essential for accurate hydration and consistent results.
-
Large Mixing Bowl: For mixing and bulk fermentation.
-
Dough Scraper (Bench Knife): Highly recommended for handling sticky dough.
-
Measuring Cups and Spoons: For smaller measurements.
-
Small Bowl: For blooming the yeast.
-
Small Ramekin: For the olive oil and herb mixture.
Ingredients
For the Dough:
-
Sourdough Starter (Active & Bubbly): 100g (Fed 4-6 hours prior and doubled in size)
-
Warm Water (90°F / 32°C): 325g
-
Instant Yeast (Optional but Recommended for Same-Day): 1/4 teaspoon (This guarantees a reliable rise within the 6-hour window, even if your starter is less powerful)
-
Bread Flour (High-Protein): 500g
-
Kosher Salt: 10g
For the Topping and Pan Coating:
-
Extra Virgin Olive Oil (Good Quality): 4-5 tablespoons, divided (3 tbsp for the skillet, 2 tbsp for the top)
-
Fresh Cherry Tomatoes: 1 cup (Varieties like Sun Gold or Sweet 100 work beautifully)
-
Fresh Rosemary Sprigs: 4-5 large sprigs, de-stemmed into smaller pieces
-
Flaky Sea Salt (like Maldon): 1-2 teaspoons, for finishing
Step-by-Step Instructions
Step 1: Mix the Dough and Bloom the Yeast (8:00 AM)
-
In a small bowl, stir the 1/4 teaspoon of instant yeast into a small amount of the measured warm water and let it sit for 5 minutes to activate.
-
In your large mixing bowl, combine the 100g of active sourdough starter and the remaining warm water. Whisk until the starter is mostly dissolved and the water is milky.
-
Add the activated yeast mixture to the starter-water blend.
-
Add the 500g of bread flour and 10g of kosher salt to the bowl. Mix with your hands or a sturdy spatula until no dry flour remains. The dough will be shaggy, sticky, and rough. This is normal.
-
Cover the bowl with a damp towel or plastic wrap and let it rest for 30 minutes.
Step 2: Coil Folds for Gluten Development (9:00 AM – 11:00 AM)
We will use a series of “coil folds” to build strength in the dough without kneading it. Unlike stretch-and-folds, coil folds are gentler and help create an airy, bubbly structure.
-
First Fold (9:00 AM): Wet your hands with water. Reach under one side of the dough, lift it up, and let the other end coil under itself. Rotate the bowl 180 degrees and repeat on the other side. Turn the bowl 90 degrees and repeat on the remaining two sides. The dough should now be a neat package resting in the center of the bowl. Cover and rest for 30 minutes.
-
Second Fold (9:30 AM): Repeat the coil fold process described above. You will notice the dough is already holding its shape better and is slightly less sticky. Cover and rest.
-
Third Fold (10:00 AM): Perform the coil fold for the third time. The dough should feel strong, elastic, and smooth. Cover and rest.
-
Fourth and Final Fold (10:30 AM): Perform the final coil fold. Let the dough rest for the final 30 minutes.
Step 3: Bulk Fermentation (11:00 AM – 4:00 PM)
-
Leave the dough covered in the warm spot.
-
Watch for Activity: Allow the dough to undergo bulk fermentation until it has increased in volume by 50% to 75%, has a visibly aerated texture, and shows bubbles on the surface. This will take about 4.5 to 5.5 hours at an ambient temperature of 72°F. Do not let it double completely, or it will over-ferment and collapse in the oven.
Step 4: Prepare the Skillet and Proof (4:00 PM – 5:30 PM)
-
Pour 3 tablespoons of extra virgin olive oil into your 10-12 inch cast-iron skillet. Use your hand to spread the oil not just on the bottom, but generously up the sides of the skillet.
-
Carefully turn the dough out of the mixing bowl and into the oiled skillet.
-
Flip the dough over once in the skillet so both sides are coated in the oil. Gently stretch the dough into a rough circle. It will not fill the pan completely at this point.
-
Cover the skillet with a clean towel or a large overturned bowl. Let the dough proof (rise for the second time) in the skillet for 1-1.5 hours.
Step 5: Dimple and Top (5:30 PM – 6:00 PM)
-
While the dough is proofing, preheat your oven to 425°F (220°C).
-
Once the dough has proofed (it should look pillowy and fill most of the skillet), remove the cover.
-
Pour the remaining 2 tablespoons of olive oil over the surface of the dough.
-
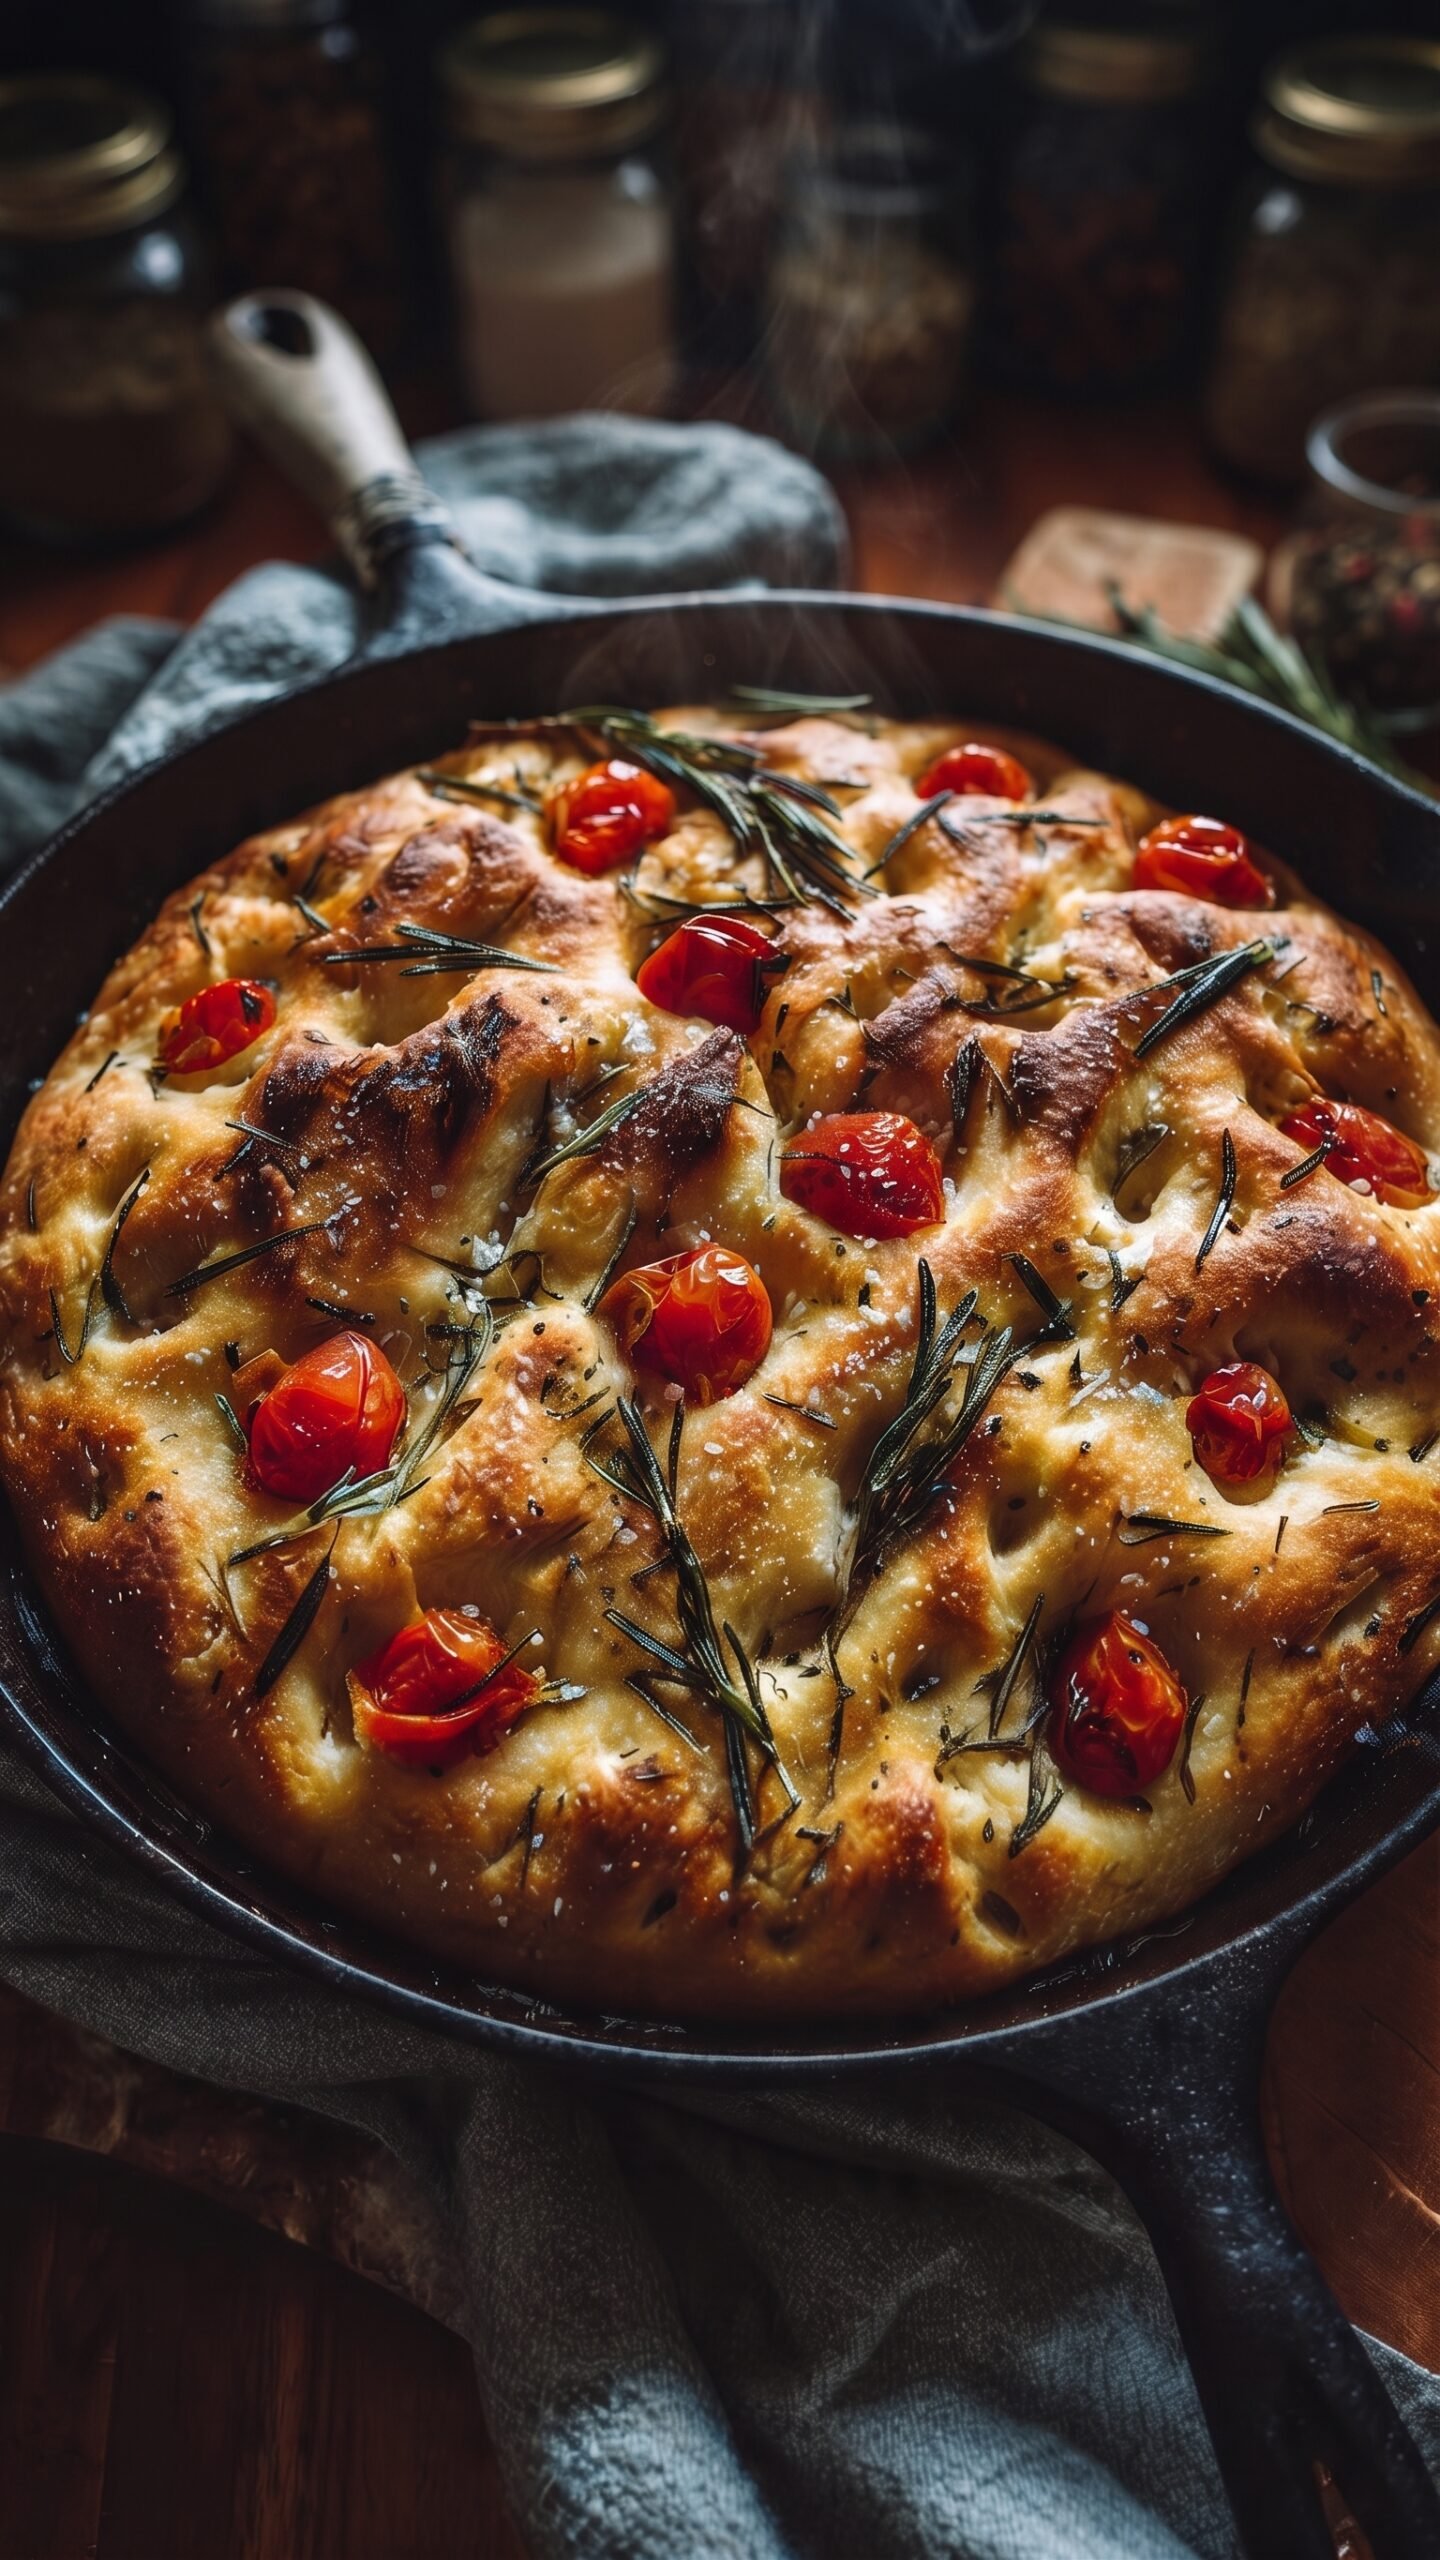
Dimple: Oil your fingers. Press your fingers straight down into the dough until you feel the bottom of the skillet. Do this repeatedly, creating a pattern of deep dimples across the entire surface. As you dimple, you will gently push the dough to fill the corners of the pan. Be firm but not rough.
-
Top: Gently press the cherry tomatoes and the fresh rosemary sprigs into the dimples you created.
-
Finish: Sprinkle the entire surface generously with flaky sea salt.
Step 6: Bake
-
Place the cast-iron skillet directly on the center rack of your preheated oven.
-
Bake for 25 to 30 minutes.
-
Check for Doneness: The focaccia is ready when the top is a deep, burnished golden brown and the bottom is crisp (carefully lift an edge with a spatula to check). The tomatoes should be blistered and roasted.
-
Remove the skillet from the oven.
Step 7: Cool and Serve
-
Let the focaccia cool in the skillet for 10-15 minutes. This is crucial as it allows the steam to settle and prevents the interior from becoming gummy.
-
Run a knife around the edge of the skillet to ensure nothing has stuck (though it shouldn’t have).
-
Carefully slide the focaccia out onto a wire rack to finish cooling.
-
Slice into wedges or squares and serve warm. It is perfect on its own or served with a side of extra-virgin olive oil for dipping.
Chef’s Pro-Tips for Success
-
Know Your Starter: The 5-hour bulk fermentation time is a guideline. The strength of your starter and the temperature of your kitchen will drastically affect the timing. Cooler kitchens will take longer; warmer kitchens will be faster. Watch the dough, not the clock.
-
Don’t Skip the Olive Oil: The 3 tablespoons in the pan and the 2 tablespoons on top are not just for flavor; they are essential for frying the crust and creating the signature dimpled texture.
-
Blooming Yeast is Insurance: While a strong sourdough starter should be enough for a 6-hour rise, the 1/4 teaspoon of commercial yeast provides a guarantee that your focaccia will be airy and rise properly within the designated timeframe, preventing a dense, under-proofed loaf.
-
Same-Day vs. Overnight: For even deeper flavor, you can place the covered skillet in the refrigerator after Step 4 and let it proof overnight (10-12 hours). Dimple and bake straight from the fridge the next morning.
Nutrition Information
Amount per serving (1/8th of a 10-inch focaccia)
-
Calories: 261 kcal
-
Total Fat: 10g
-
Saturated Fat: 1.5g
-
-
Cholesterol: 0mg
-
Sodium: 480mg
-
Total Carbohydrates: 38g
-
Dietary Fiber: 2g
-
Sugars: 1g
-
-
Protein: 6g