Preparation Time: 15 minutes
Heating Time: 20 minutes
Culturing Time: 8–12 hours
Cooling Time: 2 hours
Total Time: Approximately 11–15 hours
Recipe Yield: 8 servings
Difficulty Level: Easy
Cooking Intensity: Low
Cuisine: Traditional Homemade
Course: Breakfast, Snack
Ingredients
- 1 gallon (3.8 liters) raw milk
- 2 tablespoons plain yogurt with live active cultures (starter culture)
Optional Ingredients
- 1 tablespoon honey
- Fresh berries
- Vanilla extract
- Maple syrup
- Granola for serving
Equipment Needed
- Large stainless-steel pot
- Kitchen thermometer
- Glass jars or containers
- Wooden spoon
- Clean towel or yogurt maker
Why Make Raw Milk Yogurt?
Raw milk contains naturally occurring enzymes, beneficial bacteria, vitamins, and minerals. When cultured into yogurt, the milk develops a tangy flavor and becomes easier to digest for many people. Homemade yogurt is also free from artificial flavors, preservatives, stabilizers, and excess sugar commonly found in commercial products.
The fermentation process encourages beneficial bacteria to multiply, creating a probiotic-rich food that supports digestive health and overall wellness.
Instructions
Step 1: Prepare the Milk
Pour the raw milk into a large stainless-steel pot. Place the pot over low heat and slowly warm the milk to approximately 180°F (82°C). Heating the milk helps improve the final texture and creates a thicker yogurt.
Stir occasionally to prevent scorching.
Time: 15–20 minutes
Step 2: Cool the Milk
Remove the pot from the heat and allow the milk to cool to 110°F (43°C). Use a kitchen thermometer to monitor the temperature accurately.
This cooling stage is important because temperatures that are too high can damage the beneficial cultures needed to ferment the yogurt.
Time: 20–30 minutes
Step 3: Add the Starter Culture
Place the plain yogurt with live active cultures into a small bowl. Add a few tablespoons of the cooled milk and whisk until smooth.
Slowly stir this mixture back into the pot of milk. Mix gently until fully incorporated.
The starter culture introduces beneficial bacteria that transform the milk into yogurt.
Time: 5 minutes
Step 4: Incubate the Yogurt
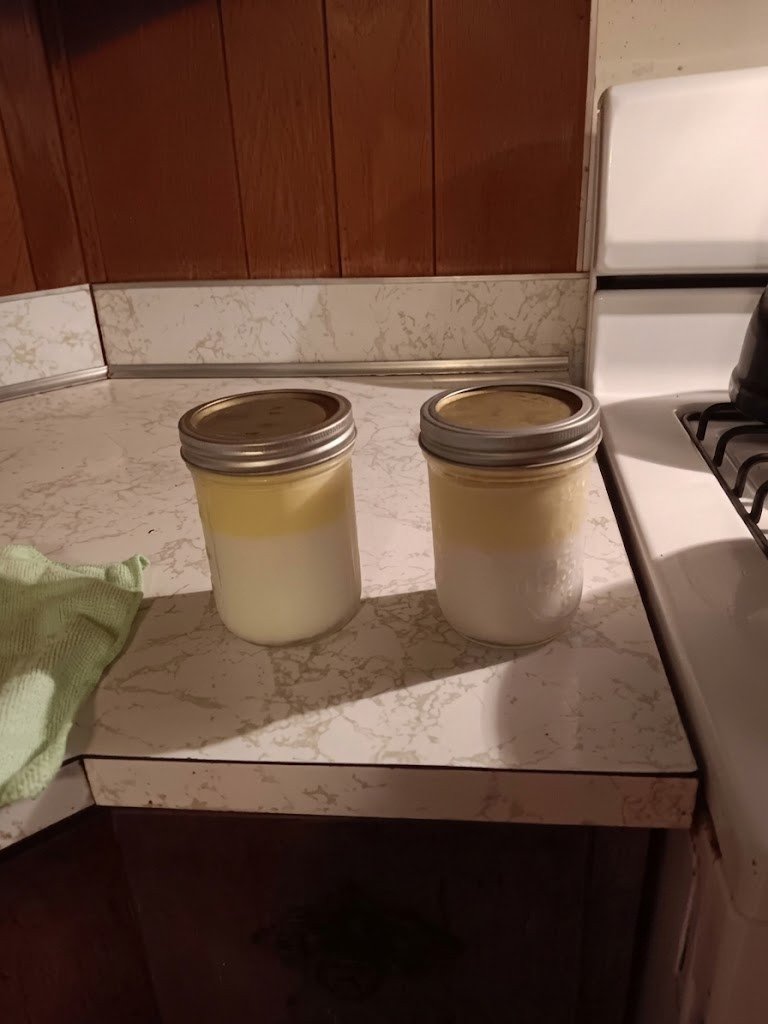
Transfer the milk mixture into clean glass jars or containers.
Cover the containers and keep them warm at approximately 105–110°F (40–43°C). You can use:
- A yogurt maker
- An oven with the light on
- A warm cooler
- An insulated container wrapped in towels
Allow the yogurt to culture undisturbed for 8–12 hours.
Longer fermentation creates a tangier flavor and thicker texture.
Time: 8–12 hours
Step 5: Check for Doneness
After incubation, the yogurt should appear thickened and slightly firm when gently tilted.
If it is still thin, continue culturing for another 1–2 hours.
Avoid stirring during the culturing period, as this can interfere with the yogurt setting properly.
Step 6: Chill the Yogurt
Place the finished yogurt in the refrigerator for at least 2 hours.
Cooling helps the yogurt thicken further and develop its final texture.
Time: 2 hours
Step 7: Serve and Enjoy
Serve chilled with your favorite toppings such as fresh fruit, honey, nuts, seeds, or granola.
The yogurt can also be used in smoothies, salad dressings, dips, and baking recipes.
Tips for Success
Use Fresh Raw Milk
Fresh, high-quality raw milk produces the best flavor and texture. Milk from grass-fed animals often results in richer yogurt.
Maintain Proper Temperature
The incubation temperature is one of the most important factors in successful yogurt making. Temperatures that are too low may prevent fermentation, while temperatures that are too high can kill the beneficial bacteria.
Avoid Metal Containers
Glass containers are ideal for culturing yogurt because they help maintain flavor and cleanliness.
Save Yogurt for Future Batches
Reserve a few tablespoons of your homemade yogurt to use as a starter culture for your next batch.
Flavor Variations
Honey Vanilla Yogurt
Stir in honey and a small amount of vanilla extract after chilling.
Berry Yogurt
Top with fresh strawberries, blueberries, raspberries, or blackberries.
Cinnamon Yogurt
Mix in a pinch of ground cinnamon and a drizzle of maple syrup.
Tropical Yogurt
Serve with pineapple, mango, and shredded coconut.
Storage Instructions
Store homemade raw milk yogurt in an airtight container in the refrigerator.
Refrigerator Storage: Up to 10 days
Always use a clean spoon when serving to help maintain freshness.
If you notice unusual odors, mold, or discoloration, discard the yogurt immediately.
Health Benefits
Homemade raw milk yogurt offers several nutritional advantages:
- Rich in protein
- Excellent source of calcium
- Contains beneficial probiotics
- Supports digestive health
- Provides vitamins B12 and riboflavin
- May be easier to digest than milk alone
Because fermentation partially breaks down lactose, some individuals find yogurt easier to tolerate than fresh milk.
Nutrition Information
Per Serving (Approximate)
- Calories: 170
- Protein: 9g
- Total Fat: 9g
- Saturated Fat: 5g
- Carbohydrates: 12g
- Sugars: 11g
- Fiber: 0g
- Calcium: 300mg
- Potassium: 380mg
- Sodium: 110mg
- Vitamin B12: 1.2mcg