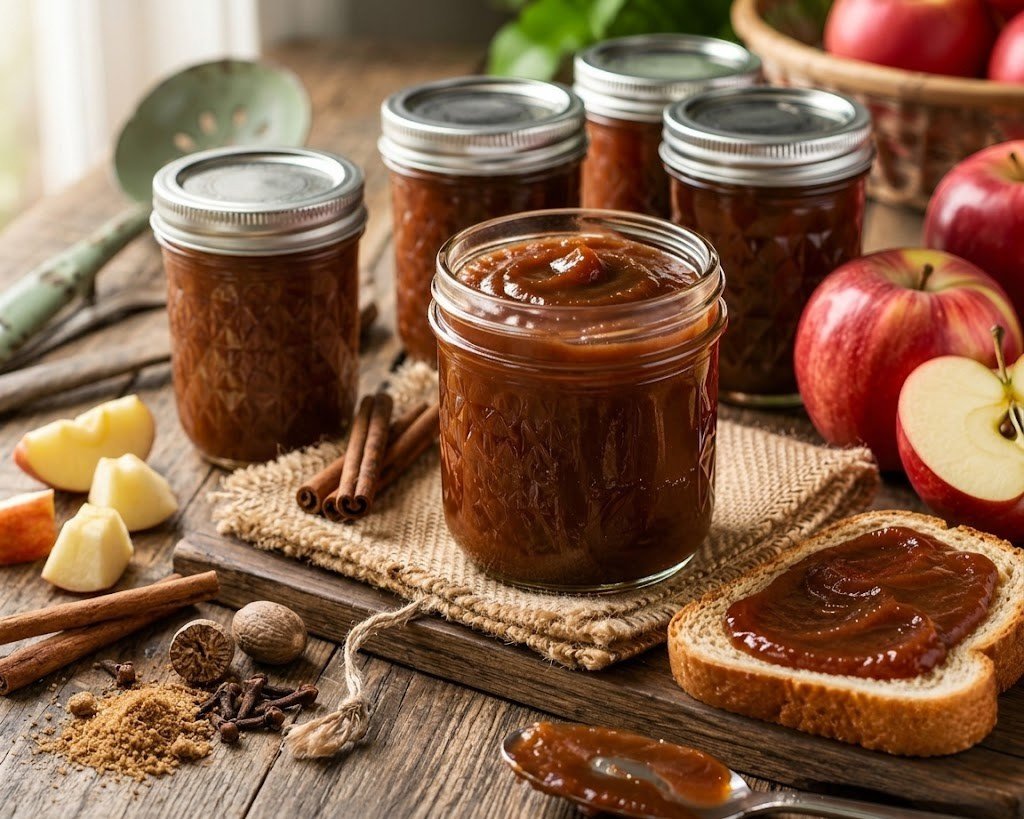
Homemade Apple Butter (Water Bath Canning)
Nothing captures the cozy essence of autumn quite like the rich, spiced aroma of apple butter simmering on the stove. Unlike apple sauce, apple butter is cooked down slowly until the natural sugars caramelize, turning it into a glossy, dark, and intensely concentrated spread.
This recipe uses the traditional water bath canning method, making it fully shelf-stable so you can preserve the harvest and enjoy rich, spiced apple butter all year long—or gift it to family and friends in charming mason jars!
Recipe Snapshot & Breakdown
-
Recipe Name: Classic Homemade Apple Butter
-
Cuisine: American / Preserve
-
Method: Slow Simmer & Water Bath Canning
-
Prep Time: 30 minutes
-
Cook Time: 2 to 3 hours (slow simmer)
-
Processing Time: 10 minutes (water bath)
-
Total Time: ~3 hours 40 minutes
-
Yield: Approx. 4 to 5 pint jars (or 8 to 10 half-pint jars)
-
Difficulty: Intermediate
Intensity Breakdown & Heat Guide
Cooking and canning require distinct heat intensities to achieve the proper texture, flavor, and food safety standards. Keep this intensity guide handy while cooking:
| Phase | Heat / Intensity Level | Duration | Purpose |
| Initial Apple Softening | Medium-High | 15–20 minutes | Softens fresh apple chunks with water to prepare for mashing/blending. |
| Spiced Sugar Simmer | Low to Medium-Low | 1.5–2.5 hours | Reduces liquid, caramelizes natural sugars, and thickens to a rich dark brown. |
| Canning Pot Pre-Heat | Medium-High | 20 minutes | Brings canning pot water to a gentle simmer ($180^\circ\text{F} / 82^\circ\text{C}$) before jar insertion. |
| Water Bath Processing | High (Rolling Boil) | 10 minutes* | Ensures sterilization and air-evacuation for a safe, long-term vacuum seal. |
*Note: If you live at an altitude above 1,000 feet, extend processing time according to the altitude adjustment table below.
Equipment Needed
-
Large non-reactive stockpot or heavy Dutch oven
-
Food mill, immersion blender, or standard high-speed blender
-
Large water bath canner with a wire rack
-
Mason jars (pint or half-pint sizes) with fresh lids and bands
-
Canning toolkit: jar lifter, bubble remover, funnel, and magnetic lid wand
-
Clean kitchen towels
Ingredients List
-
6 lbs (2.7 kg) Apples: A mix of sweet and tart varieties works best (e.g., Honeycrisp, Fuji, Granny Smith, or McIntosh). Peeled, cored, and coarsely chopped.
-
1/2 cup Water (or apple cider for extra depth)
-
2 cups Granulated White Sugar
-
1 cup Dark Brown Sugar (packed)
-
2 tsp Ground Cinnamon
-
1/2 tsp Ground Cloves
-
1/4 tsp Ground Nutmeg
-
1/4 tsp Fine Sea Salt
-
2 tsp Pure Vanilla Extract (added at the very end)
Step-by-Step Instructions
Phase 1: Softening the Apples
-
Prep the Apples: Peel, core, and coarsely chop 6 lbs of fresh apples.
-
First Cook: In your large stockpot, combine the chopped apples and 1/2 cup of water. Place over Medium-High heat. Cover and bring to a simmer. Cook for 15 to 20 minutes, stirring occasionally, until the apples are completely soft and fork-tender.
-
Puree: Remove from heat. Use an immersion blender directly in the pot, or transfer the cooked apples in batches to a blender or food mill. Puree until smooth and silky with no remaining lumps.
Phase 2: The Slow Caramelization (Building the Butter)
-
Add Spices & Sugars: Return the smooth apple puree to the stockpot. Stir in the granulated sugar, brown sugar, ground cinnamon, ground cloves, ground nutmeg, and salt.
-
Simmer & Reduce: Turn the heat down to Low or Medium-Low. Leave the pot partially uncovered to allow steam to escape.
-
Stir Frequently: Simmer for $1.5 \text{ to } 2.5 \text{ hours}$. Stir often—especially as it thickens—to prevent the bottom from scorching.
-
Test for Doneness (The Spoon Test): The apple butter is done when it is thick, dark mahogany brown, and holds its shape on a spoon. Spoon a small amount onto a cold plate; if no watery ring forms around the edges after a minute, it is ready.
-
Finish: Stir in the 2 tsp of pure vanilla extract and turn off the heat.
Phase 3: Water Bath Canning Process
-
Prepare Canner & Jars: Fill your water bath canner half-full with water and heat over Medium-High until hot (around $180^\circ\text{F}$), but not boiling. Wash your mason jars, lids, and bands in warm soapy water. Keep jars hot in the water canner to prevent thermal shock when filling.
-
Ladle Apple Butter: Using a canning funnel, ladle hot apple butter into clean, hot jars, leaving 1/4-inch ($0.6\text{ cm}$) of headspace at the top.
-
Remove Air Bubbles: Run a plastic bubble remover or utensil around the inside edge of the jar to release trapped air bubbles. Adjust headspace if necessary.
-
Seal Jars: Wipe the rims of the jars thoroughly with a clean, damp cloth to remove any sticky residue. Place a flat lid on each jar and screw the band down until fingertip tight (do not overtighten).
-
Process in Water Bath: Lower the filled jars into the canning pot using a jar lifter. Ensure the jars are covered by at least 1 to 2 inches of water. Cover the pot with a lid and bring to a full, rolling boil over High heat.
-
Time the Process: Once a full boil is reached, process for 10 minutes (adjusting for altitude as necessary).
-
Cool & Set: Turn off the heat, remove the pot lid, and let the jars sit in the hot water for 5 minutes. Carefully remove the jars with your jar lifter and place them upright on a towel-lined countertop. Let them cool undisturbed for 12 to 24 hours. You should hear the satisfying “pop” of the lids sealing!
Altitude Adjustment Guide
Water boils at lower temperatures at higher elevations. Adjust your canning processing time based on your elevation above sea level:
-
0 – 1,000 feet: 10 minutes
-
1,001 – 3,000 feet: 15 minutes
-
3,001 – 6,000 feet: 20 minutes
-
Above 6,000 feet: 25 minutes
Storage, Shelf Life, & Yield
-
Unopened Shelf Life: Properly sealed jars stored in a cool, dark, dry place (like a pantry) will maintain peak quality for 12 to 18 months.
-
After Opening: Store opened jars in the refrigerator and consume within 3 to 4 weeks.
-
Unsealed Jars: If any jar fails to seal after 24 hours (the center lid flexes up and down when pressed), store it immediately in the refrigerator and use it within a month.
Complete Nutritional Profile
Serving Size: 1 Tablespoon (approx. 20g)
Servings Per Recipe: ~80 tablespoons
| Nutrient | Amount per Serving | % Daily Value* |
| Calories | 45 kcal | — |
| Total Fat | 0.1 g | 0% |
| Saturated Fat | 0 g | 0% |
| Trans Fat | 0 g | — |
| Cholesterol | 0 mg | 0% |
| Sodium | 8 mg | 0% |
| Total Carbohydrates | 11.5 g | 4% |
| Dietary Fiber | 0.6 g | 2% |
| Total Sugars | 10.2 g | — |
| Includes Added Sugars | 7.5 g | 15% |
| Protein | 0.1 g | 0% |
| Vitamin D | 0 mcg | 0% |
| Calcium | 6 mg | 0% |
| Iron | 0.1 mg | 1% |
| Potassium | 28 mg | 1% |