- Prep Time: 25 minutes
- Resting/Fermentation Time: 8–12 hours
- Second Rise Time: 2–3 hours
- Bake Time: 35–40 minutes
- Total Time: Approximately 12–15 hours
- Difficulty Level: Intermediate
- Yield: 1 large loaf (12 slices)
Ingredients
For the Dough
- 100g active sourdough starter
- 350g bread flour
- 100g all-purpose flour
- 240ml warm milk
- 40g unsalted butter, softened
- 25g honey or sugar
- 8g salt
- 1 egg
Optional Topping
- Melted butter for brushing after baking
Equipment Needed
- Large mixing bowl
- Stand mixer (optional)
- Loaf pan (9×5-inch)
- Kitchen scale
- Clean kitchen towel or plastic wrap
- Cooling rack
What Makes This Bread Soft?
The secret to achieving an ultra-soft sourdough sandwich loaf is enrichment. Milk, butter, and egg add moisture and tenderness to the dough, while honey provides slight sweetness and helps keep the bread soft for days.
Using bread flour gives the loaf enough structure, while all-purpose flour balances the texture so it doesn’t become too chewy.
Step-by-Step Instructions
Step 1: Feed Your Starter
Before starting, make sure your sourdough starter is active and bubbly. Feed it about 4–6 hours before mixing the dough. A healthy starter should double in size and smell pleasantly tangy.
A strong starter is essential for a light and fluffy sandwich loaf.
Step 2: Mix the Dough
In a large bowl, combine:
- Active sourdough starter
- Warm milk
- Honey
- Egg
Whisk until smooth.
Add the bread flour and all-purpose flour. Mix until a shaggy dough forms. Let the dough rest for 20–30 minutes. This resting period, called autolyse, helps hydrate the flour and improves gluten development.
After resting, add the salt and softened butter.
Step 3: Knead the Dough
Knead the dough for about 8–10 minutes using a stand mixer or 10–12 minutes by hand.
The dough should become:
- Smooth
- Elastic
- Slightly tacky but not sticky
If the dough feels too wet, add a small amount of flour one tablespoon at a time.
Step 4: Bulk Fermentation
Place the dough into a lightly greased bowl. Cover with a towel or plastic wrap.
Let the dough rise at room temperature for 6–8 hours, depending on the warmth of your kitchen.
During this time, the dough should increase in size by about 50–75%.
Optional Stretch and Fold
To strengthen the dough, perform 2–3 stretch-and-fold sessions during the first 2 hours.
This helps create a better structure and softer crumb.
How to Do Stretch and Fold
- Wet your hands slightly
- Grab one side of the dough
- Stretch upward gently
- Fold over the center
- Rotate the bowl and repeat
This technique improves gluten strength without aggressive kneading.
Step 5: Shape the Dough
Lightly flour your work surface.
Turn the dough out and gently flatten it into a rectangle. Roll it tightly into a log shape.
Pinch the seams closed.
Place the shaped dough seam-side down into a greased loaf pan.
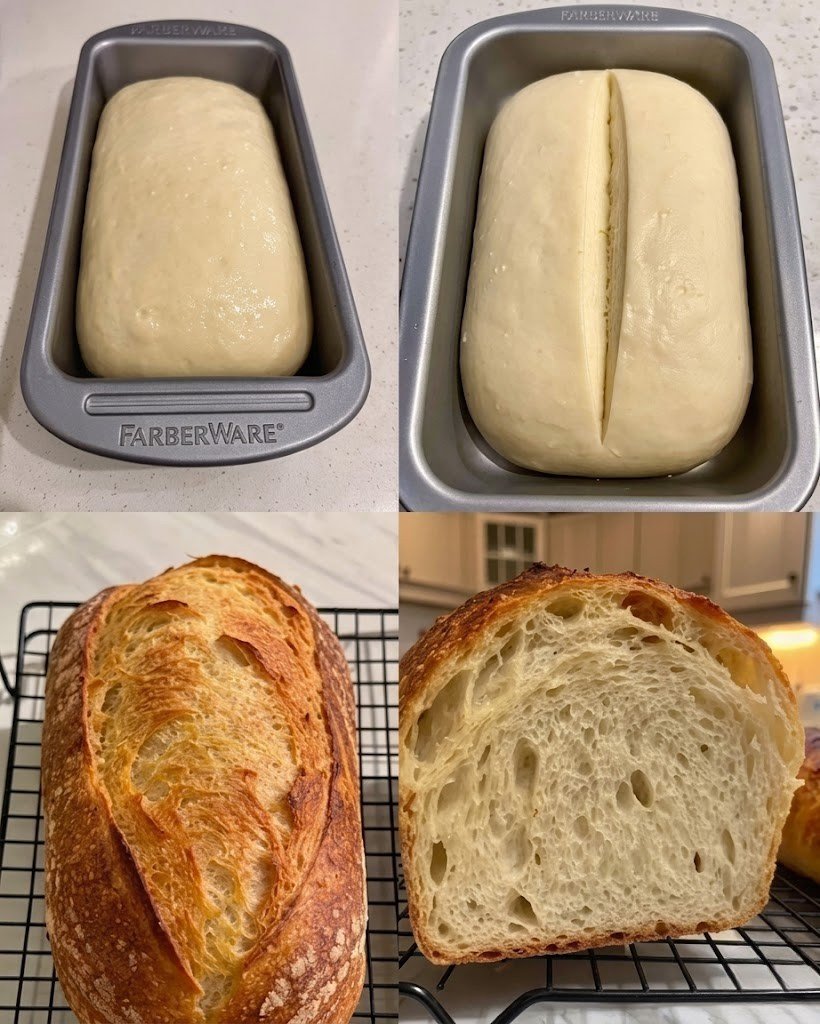
Step 6: Second Rise
Cover the loaf pan loosely and let the dough rise for 2–3 hours.
The dough should rise just above the edge of the loaf pan.
Do not rush this step. Proper proofing creates the softest texture.
Step 7: Bake the Bread
Preheat your oven to 375°F (190°C).
Bake for 35–40 minutes until the top is golden brown.
The internal temperature should reach about 200°F (93°C).
If the top browns too quickly, loosely tent with foil during the last 10 minutes.
Step 8: Cool Completely
Remove the bread from the pan immediately after baking.
Brush the top with melted butter for an extra-soft crust.
Let the bread cool completely on a wire rack before slicing.
Cooling allows the crumb structure to finish setting.
Tips for the Best Sourdough Sandwich Bread
Use an Active Starter
A weak starter can result in dense bread. Always use starter at peak activity.
Don’t Add Too Much Flour
Soft dough equals soft bread. Avoid over-flouring during kneading.
Be Patient
Sourdough fermentation takes time. Warmer kitchens rise faster, cooler kitchens slower.
Use a Kitchen Scale
Measuring ingredients by weight ensures consistent results every time.
Overnight Refrigeration Option
You can refrigerate the dough overnight after bulk fermentation.
This method:
- Improves flavor
- Makes shaping easier
- Fits better into busy schedules
Simply shape the chilled dough the next day and allow it to rise before baking.
Storage Instructions
Room Temperature
Store in an airtight container or bread bag for up to 4 days.
Freezer
Slice the loaf before freezing for convenience.
Freeze for up to 3 months.
To reheat, toast slices directly from frozen.
Serving Ideas
This soft sourdough sandwich bread is perfect for:
- Turkey sandwiches
- Peanut butter and jelly
- Avocado toast
- Grilled cheese
- French toast
- Breakfast toast with butter and jam
Its soft crumb and mild tangy flavor pair beautifully with both sweet and savory toppings.
Common Problems and Solutions
Dense Bread
Cause:
- Weak starter
- Under-proofing
Solution:
- Use an active starter and allow longer rise times.
Gummy Texture
Cause:
- Slicing too early
Solution:
- Cool completely before cutting.
Dry Bread
Cause:
- Too much flour
- Overbaking
Solution:
- Use accurate measurements and monitor bake time carefully.
Nutrition Information (Per Slice)
Approximate values based on 12 slices:
- Calories: 180
- Carbohydrates: 28g
- Protein: 5g
- Fat: 5g
- Saturated Fat: 2g
- Fiber: 1g
- Sugar: 3g
- Sodium: 180mg