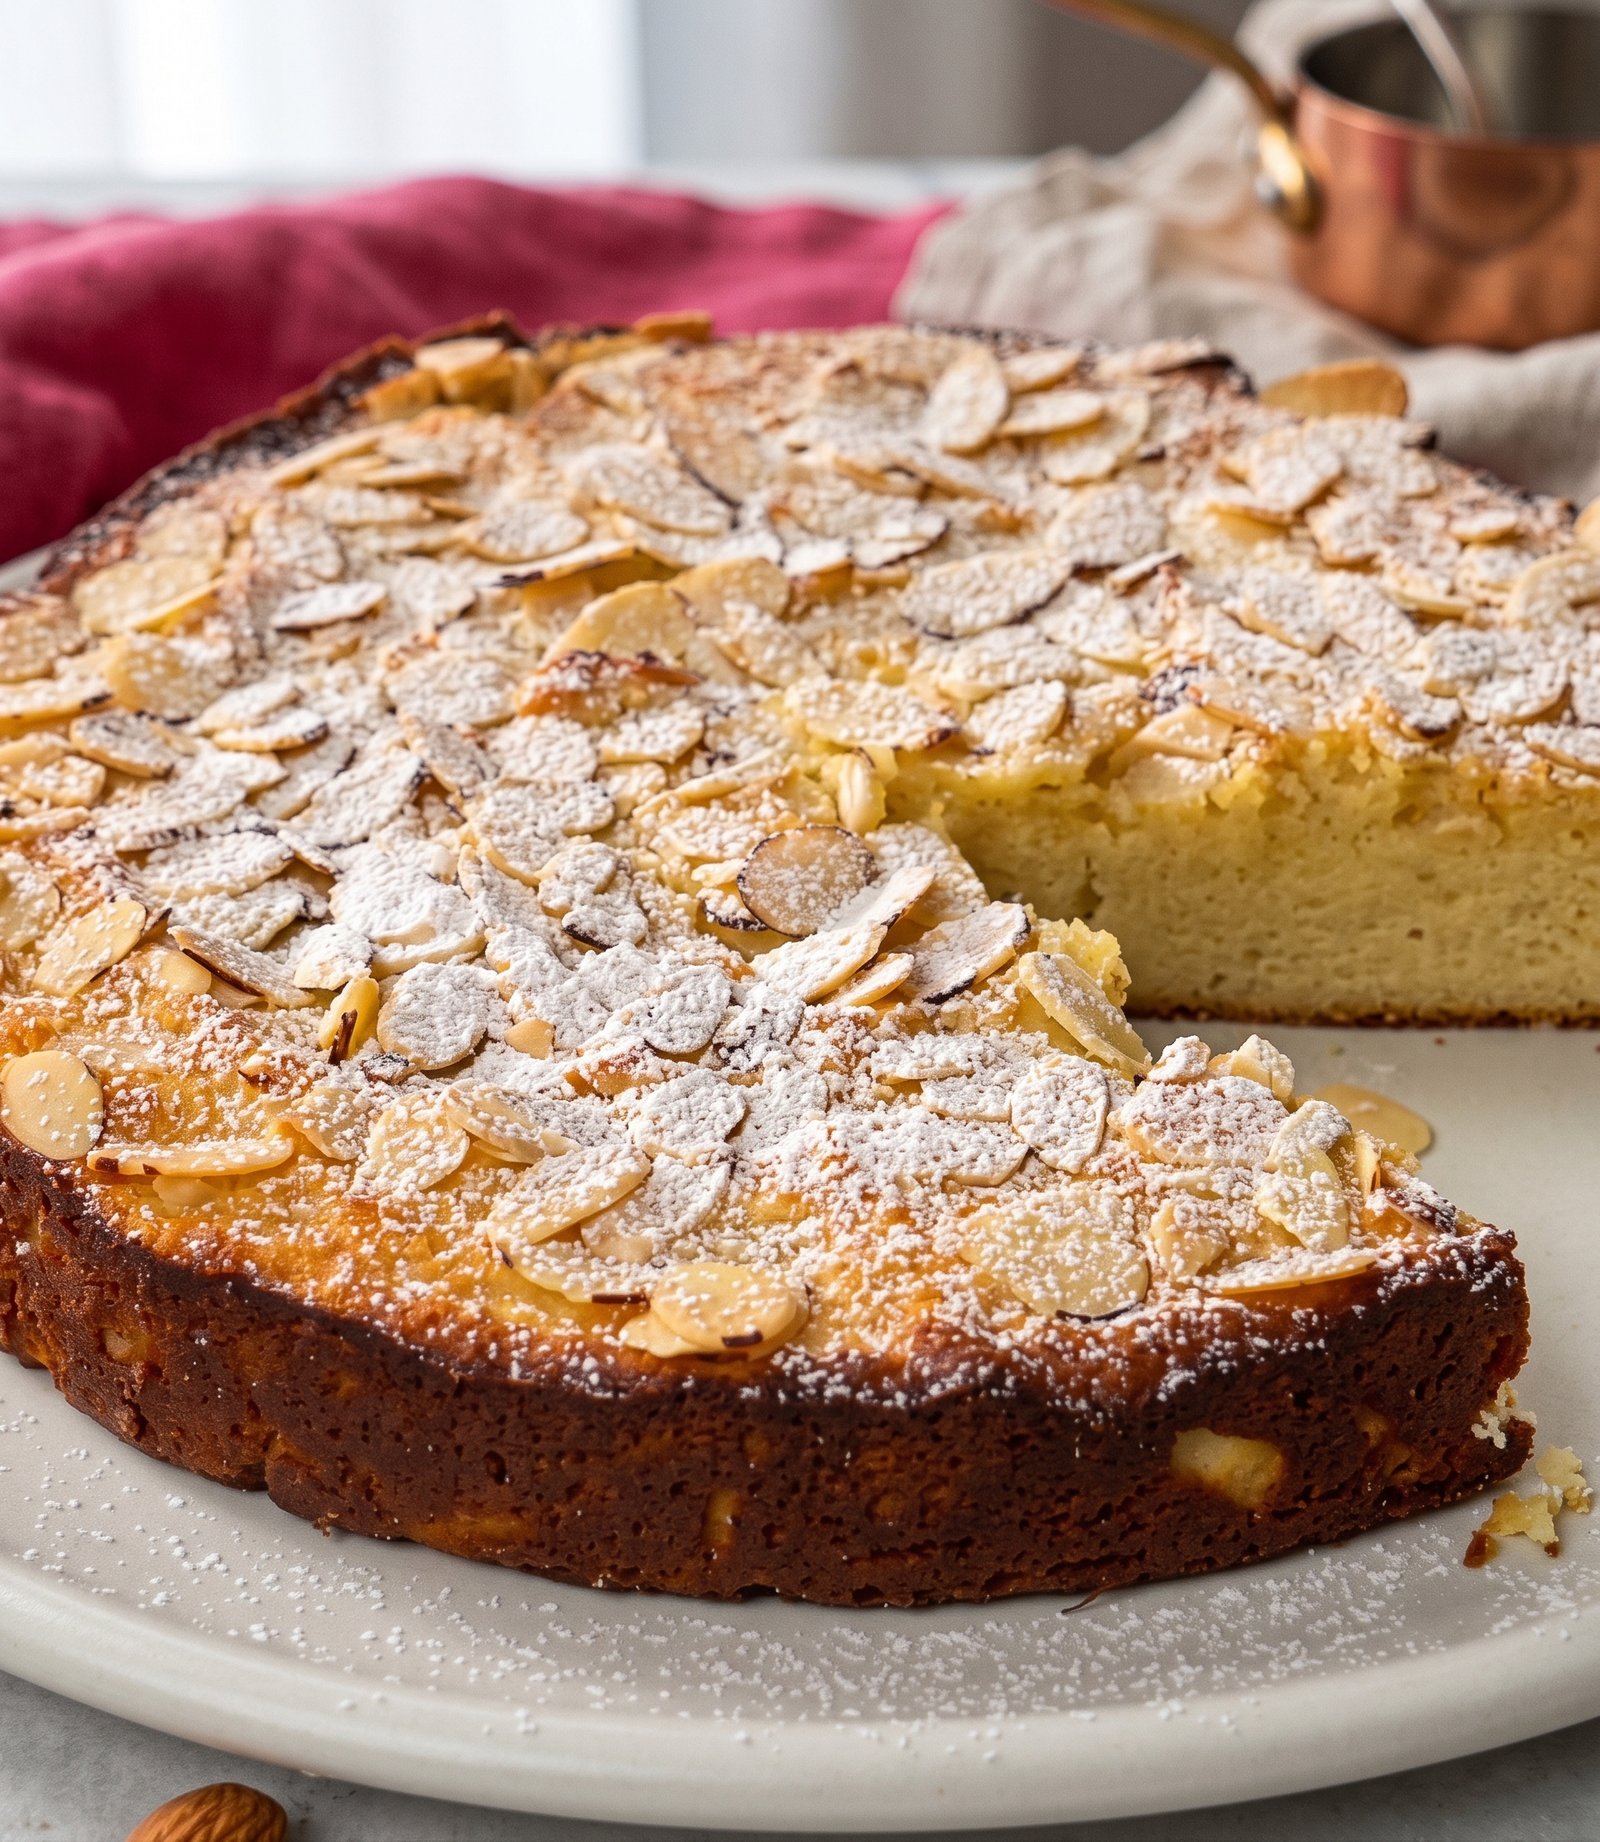
Prep Time: 20 Minutes Cook Time: 35 Minutes Total Time: 55 Minutes (+ cooling time) Skill Level: Intermediate
Equipment Needed
-
1 (8-inch or 9-inch) Springform Pan (Note: An 8-inch pan will create a taller cake, while a 9-inch pan will make it slightly wider and thinner. We recommend an 8-inch pan for the ideal texture.)
-
2 Large Mixing Bowls
-
Electric Hand Mixer or Stand Mixer (An absolute necessity for achieving the proper volume and texture.)
-
Whisk
-
Silicone Spatula
-
Measuring Cups and Spoons
-
Parchment Paper
-
Cooling Rack
-
Sifter or Small Fine-Mesh Strainer (For dusting the optional powdered sweetener at the end.)
Ingredients
For the Cake:
-
4 Large Eggs, room temperature: It is absolutely critical that your eggs are at room temperature. This is not a suggestion—it’s a rule! Cold eggs will not whip up nearly as much, leading to a much denser and heavier cake.
-
2 Cups (240g) Superfine Blanched Almond Flour: Ensure you use blanched almond flour, not almond meal. Blanched almond flour (where the dark skins have been removed) provides the ideal light, golden color and the softest, most delicate texture. Superfine almond flour works best.
-
2/3 Cup (120g) Granulated Keto Sweetener: (e.g., Erythritol-based monk fruit blend, Allulose, or Swerve). Choose your favorite non-glycemic sweetener that is a 1:1 replacement for regular sugar. For the finest texture, we strongly recommend powdered or “confectioner’s” sweetener, but granulated will work if it’s the only type available.
-
1/4 Cup (56g) Unsalted Butter, melted and cooled slightly: If you are strictly dairy-free, melted refined coconut oil is an excellent, flavor-neutral substitute.
-
1 Teaspoon Vanilla Extract: Use high-quality vanilla extract for the best, most authentic flavor profile.
-
1/2 Teaspoon Almond Extract: This is a vital ingredient. While it may seem small, it dramatically amplifies and deepens the natural almond flavor of the flour, making the cake feel truly special. Don’t omit this if possible!
-
1/2 Cup (120ml) Unsweetened Almond Milk: Make sure you use the unsweetened variety. Any other low-carb milk (such as unsweetened coconut milk beverage or a mix of heavy cream and water) will also work.
-
1 1/2 Teaspoons Baking Powder: This provides the necessary leavening, giving the cake its gentle rise and lighter texture. Make sure it is fresh.
-
1/4 Teaspoon Salt: Salt is crucial in all baking. It doesn’t make the cake salty; rather, it brightens and elevates all the other flavors, preventing the cake from tasting flat.
For the (Optional but Highly Recommended) Topping:
-
1/4 Cup (approx. 20g) Sliced Almonds, raw: The sliced almonds add a beautiful visual appeal and a truly wonderful, toasty crunch to every single bite.
-
1-2 Tablespoons Powdered Keto Sweetener: Use a fine-mesh sifter to dust this elegantly over the completely cooled cake for a classic, snowy-white finish.
Instructions with Time & Intensity Breakdown
Stage 1: Preparation
-
Total Time for This Stage: 5 Minutes
-
Intensity: Low
-
Preheat the Oven: Adjust your oven rack to the middle position. Turn on your oven and preheat to 350°F (175°C). It is vital to let your oven reach full temperature before the cake is ready to be baked.
-
Prepare the Pan: Grease the bottom and sides of your 8-inch springform pan thoroughly with butter or a neutral oil. Line the base of the pan with a circle of parchment paper. (To do this, trace the bottom of your pan onto the paper and cut it out.) Lightly grease the top of the parchment paper circle. This double-layer of protection will guarantee your cake releases cleanly and perfectly from the pan.
Stage 2: Separate and Prepare the Wet Ingredients
-
Total Time for This Stage: 5 Minutes
-
Intensity: Medium
-
Separate the Eggs: Very carefully separate the 4 eggs. Place all 4 egg whites into one large mixing bowl and all 4 egg yolks into the other large mixing bowl. Make absolutely sure that not even a tiny speck of yolk gets into the bowl of egg whites; any fat or yolk will prevent the whites from whipping into beautiful, stiff peaks.
-
Mix the Egg Yolks: In the bowl with the yolks, add the melted and cooled butter, vanilla extract, almond extract, and almond milk. Use a whisk to mix these liquid ingredients together until they are well combined.
-
Combine Yolks and Sweetener: Add the granulated (or powdered) sweetener to the yolk mixture. Whisk vigorously for about 1 minute until the mixture is slightly lighter in color and completely smooth. Set this bowl aside for now.
Stage 3: Combine and Whisk the Dry Ingredients
-
Total Time for This Stage: 2 Minutes
-
Intensity: Low
-
In a separate bowl, add the blanched almond flour, baking powder, and salt.
-
Use a whisk to mix these dry ingredients together very well, ensuring the baking powder and salt are evenly distributed throughout the almond flour. If your almond flour appears very clumpy, we recommend pressing it through a sifter before mixing. Set this bowl aside.
Stage 4: Whip the Egg Whites (Crucial Step!)
-
Total Time for This Stage: 5 Minutes (of continuous, active time)
-
Intensity: Medium-High
-
Make sure your beaters (from your hand or stand mixer) are perfectly clean and dry. Starting on low speed, begin whipping the bowl of egg whites. They will first become foamy with large bubbles.
-
As they begin to opaque, increase the speed of the mixer to high. Continue whipping for 3-5 full minutes. The whites will become a beautiful, glossy white.
-
Test the Peaks: Stop the mixer. Pull the beaters straight up out of the whipped whites. They should form a clear peak that is stiff and stands straight up, without curling over or collapsing. If they seem soft, continue whipping. This step is critical; properly stiff egg whites are the entire structural support system for this flourless, low-carb cake, creating its incredible light, airy lift and texture.
Stage 5: Gently Combine Everything (The Art of Folding)
-
Total Time for This Stage: 3 Minutes
-
Intensity: High (Needs gentle and careful precision)
-
Add the Flour to the Yolks: Take the bowl with the yolk mixture. Add about half of your almond flour mixture to the wet yolks and use a whisk to mix until just combined. Add the remaining flour and whisk again, creating a thick batter. This will look a bit dry, but don’t worry!
-
Add the Topping (Optional): If you are choosing to use the sliced almonds as a topping, now is the time. Gently fold about 3/4 of the sliced almonds into this thick batter using your silicone spatula. Keep the remaining almonds to sprinkle on top.
-
Lighten the Batter: Now, the most important part. Take about a quarter of your whipped egg whites and add them to the thick almond batter. Use your whisk and stir them together; this first addition is to simply lighten up the dense batter, making it easier to work with. The batter will become much smoother and less thick.
-
The “Folding” Technique: Add the remaining egg whites to the bowl. Do not stir and do not use a whisk! Take your silicone spatula and, starting from the center of the bowl, push down to the bottom, then scoop the batter from the bottom up and over the egg whites. Rotate the bowl as you repeat this gentle, slow, scooping motion. Continue doing this carefully until the white streaks of the egg whites are just incorporated, but be extremely gentle. We are not “mixing”; we are carefully folding the two textures together. Our goal is to maintain and preserve all that beautiful, precious air we just whipped into the egg whites. Working too vigorously or for too long will deflate the batter and lead to a very dense, heavy cake.
Stage 6: Bake to Perfection
-
Active Time for This Stage: 2 Minutes
-
Passive Time for This Stage: 35-40 Minutes
-
Intensity: Low
-
Immediately and gently pour the beautiful, light batter into your prepared springform pan. Use your spatula to spread the top evenly without pushing down or deflating it.
-
If using the sliced almonds, sprinkle the remaining almonds evenly over the top of the cake.
-
Place the pan on the middle rack of your preheated oven.
-
Bake for 35-40 minutes. How to tell when it’s done? The top should be a beautiful, even, deep golden brown and the cake should feel firm and slightly springy when gently touched. For the most accurate check, insert a toothpick (or wooden skewer) into the very center of the cake. It should come out clean, without any wet batter. If you see wet batter, add 3-5 more minutes to the bake time and check again. A few moist crumbs on the toothpick are perfectly fine and often indicate an ideal level of moisture!
Stage 7: The Essential Cool Down
-
Total Time for This Stage: Minimum 30 Minutes (Passive)
-
Intensity: Medium (Requires patience and care during removal)
-
When your gorgeous almond cake is done, remove the pan from the oven. Let it sit in the pan on a cooling rack for 15-20 minutes. Do not attempt to remove the pan immediately, as the delicate structure of a flourless cake is very weak when hot.
-
After the initial cool down, take a thin knife and gently run it around the outside edge of the cake to ensure no parts are sticking to the sides of the pan. Unlatch the springform ring and very carefully lift it straight up and off.
-
Let the cake cool down entirely on the cooling rack. A warm almond cake is incredibly fragile and can easily crack or fall apart if handled too soon. Be patient! It will continue to firm up as it cools, achieving its final, wonderful texture.
Stage 8: The Finishing Touch and Serving
-
Total Time for This Stage: 2 Minutes
-
Intensity: Low
-
Once the cake is completely and totally cool (it should feel room temperature all over), it is ready for the optional, yet beautiful, final touch.
-
Place 1-2 tablespoons of powdered keto sweetener into a small fine-mesh sifter or strainer. Lightly tap the sifter to create a delicate, snowy dust all over the surface of the cake. (A warm cake will immediately melt the sugar, so please ensure it is fully cooled!)
-
For beautiful, clean slices, use a large, sharp knife. Clean the knife between each slice to ensure a pristine cut. Serve immediately. This Low Carb Keto Almond Cake is wonderful on its own, but also is incredibly delicious when paired with a simple dollop of freshly whipped, unsweetened heavy cream, a small scoop of sugar-free vanilla ice cream, or a small handful of fresh, vibrant berries.
Pro-Tips and Chef Secrets for the Perfect Cake
-
Room Temperature Everything: We will say it again: room temperature eggs and almond milk are non-negotiable. This is the single most common reason why keto cakes come out too dense and heavy.
-
Choose the Right Pan: A springform pan is truly your best friend here. It is nearly impossible to turn a flourless almond flour cake out of a regular 8×8 square or round baking pan without the risk of it breaking apart, especially while warm.
-
Powdered Swerve (or similar) is Best: If you are finding your cake has a slight crunchy texture, try pulsing your granulated sweetener in a small blender or food processor to turn it into a finer powder. A powdered sweetener dissolves much more easily into the wet ingredients, creating a smoother, cleaner texture.
-
How to Store: Once cooled, store the cake in an airtight container at room temperature for 1-2 days. If you still have leftovers after that, move the container to the refrigerator where it will keep for up to 5 days. It is delicious chilled, too!
Freezing Your Keto Almond Cake
This cake freezes incredibly well! To do so:
-
Let the cake cool completely. (Do not dust with powdered sugar first).
-
Wrap the whole cake or individual slices very tightly with a layer of plastic wrap. Then, wrap it again in a layer of aluminum foil or place it in a high-quality freezer bag. This prevents any unwanted freezer burn and protects the delicate flavor of the cake.
-
Place in the freezer for up to 2 months.
-
To Thaw: Simply remove the cake or slices from the freezer and place them on the countertop at room temperature. A small slice will be ready in about 30-45 minutes; the whole cake will take a few hours. This is a brilliant way to have a sophisticated keto dessert ready at a moment’s notice!
Nutritional Profile and Beyond
The Foundation: Almonds are a Keto Powerhouse
The entire foundation of this cake is blanched almond flour. For anyone following a ketogenic or low-carb lifestyle, almonds are truly a nutrition star. They are naturally incredibly high in healthy monounsaturated and polyunsaturated fats, which are the fundamental fuel for ketosis. Furthermore, almond flour is very low in carbohydrates while being relatively high in fiber. This unique combination helps you feel full and deeply satisfied, eliminating the classic sugar crashes and cravings associated with high-carb desserts. This recipe is not just “low-carb” as a tagline; it is fundamentally designed around these low-carb principles to create a genuine sugar-free experience.
Protein and Micronutrients
Beyond its macro-profile, this Low Carb Keto Almond Cake is also a good source of quality protein, thanks entirely to the blend of four eggs and the protein naturally present in the almond flour. The eggs contribute all nine essential amino acids that your body needs but cannot produce itself, making this a protein-rich choice for a dessert. Additionally, almonds are a fantastic dietary source of Vitamin E (a powerful fat-soluble antioxidant), magnesium (which is critical for nerve and muscle function), and a array of other trace minerals.
Final Calorie and Macro Counts
Below is the nutritional breakdown per serving, based on a single slice (if the whole cake is divided into 12 generous portions). Please note that your final counts may differ slightly based on the specific brand of almond flour and keto sweetener you use. This estimation includes the optional sliced almond topping. The optional powdered sugar dusting adds negligible calories and zero net carbs per serving.
(Nutrition Data per Serving, based on 1/12th of the cake)
-
Calories: 225
-
Total Fat: 19.5g
-
Saturated Fat: 5g
-
-
Protein: 8.5g
-
Total Carbohydrates: 8g
-
Fiber: 4g
-
Net Carbohydrates: 4g