-
Prep Time: 15 minutes
-
Freezing Time: 6 to 8 hours (or overnight)
-
Total Time: 6 hours 15 minutes
-
Recipe Yield: 8 servings (about 1 quart / 4 cups)
-
Difficulty / Intensity Level: Low (Beginner-Friendly)
-
Physical Effort: Minimal (requires holding a hand mixer or stand mixer for 3–5 minutes).
-
Precision Needed: Moderate (whipping cream to stiff peaks without over-beating into butter).
-
Equipment Needed: Basic (Electric hand mixer or stand mixer, large mixing bowl, spatula, and a 9×5-inch loaf pan or airtight container).
-
Ingredients
-
2 cups (16 oz / 480 ml) Heavy Whipping Cream (Must be very cold, minimum 36% milk fat content)
-
1 can (14 oz / 396 g) Sweetened Condensed Milk (Chilled)
-
1 to 2 teaspoons Pure Vanilla Extract (Adjust to taste; high-quality extract produces the best base flavor)
Step-by-Step Instructions
Step 1: Chill Your Tools
For maximum volume and speed, place your mixing bowl and beaters in the refrigerator for 15–20 minutes before starting. Keeping your heavy cream as cold as possible helps the fat globules trap air quickly and hold their structure.
Step 2: Combine the Flavor Base
In a large bowl, pour in the entire can of chilled sweetened condensed milk and stir in 1 to 2 teaspoons of pure vanilla extract. If you are adding any smooth liquid flavor extracts (like almond or peppermint) or natural food colorings, mix them into the condensed milk at this stage so they distribute evenly.
Step 3: Whip the Heavy Cream (Intensity: Moderate)
In your pre-chilled mixing bowl, add the 2 cups of cold heavy whipping cream. Using an electric hand mixer or stand mixer fitted with the whisk attachment, beat the cream starting on medium speed for 1 minute, then increase to high speed. Beat for approximately 3 to 5 minutes until stiff peaks form.
-
Chef’s Tip: You know you’ve reached “stiff peaks” when you lift the beaters straight up and the whipped cream holds sharp, firm points without drooping back into the bowl. Be careful not to over-whip, or the fat will separate into butter!
Step 4: Fold the Mixture (Intensity: Delicate)
Add about one-third of your whipped cream into the bowl with the sweetened condensed milk base. Gently whisk or stir to lighten the condensed milk mixture.
Next, pour the rest of the condensed milk mixture into the remaining whipped cream. Using a flexible silicone spatula, gently fold the two mixtures together using an under-and-over sweeping motion. Turn the bowl continuously as you fold. Take your time with this step—mixing too vigorously will deflate the air you worked so hard to whip into the cream.
Step 5: Layer In Mix-Ins (Optional)
If you are adding solid mix-ins (such as crushed cookies, fruit purees, chocolate chips, or fudge swirls), gently fold them into the mixture during the last few strokes, or layer them into the container alongside the base mixture.
Step 6: Freeze & Set
Transfer the smooth ice cream mixture into an 8×4-inch or 9×5-inch metal loaf pan, a glass container, or a freezer-safe tub. Smooth the top with your spatula. To prevent ice crystals from forming on the surface, press a piece of parchment paper or plastic wrap directly onto the surface of the ice cream mixture, then wrap the top tightly with foil or an airtight lid.
Place the container in the coldest part of your freezer (usually the back) for at least 6 to 8 hours, or ideally overnight, until solid and scoopable.
Popular Flavor Variations
The brilliance of this 3-ingredient base is its versatility. Customize it with these popular variations:
-
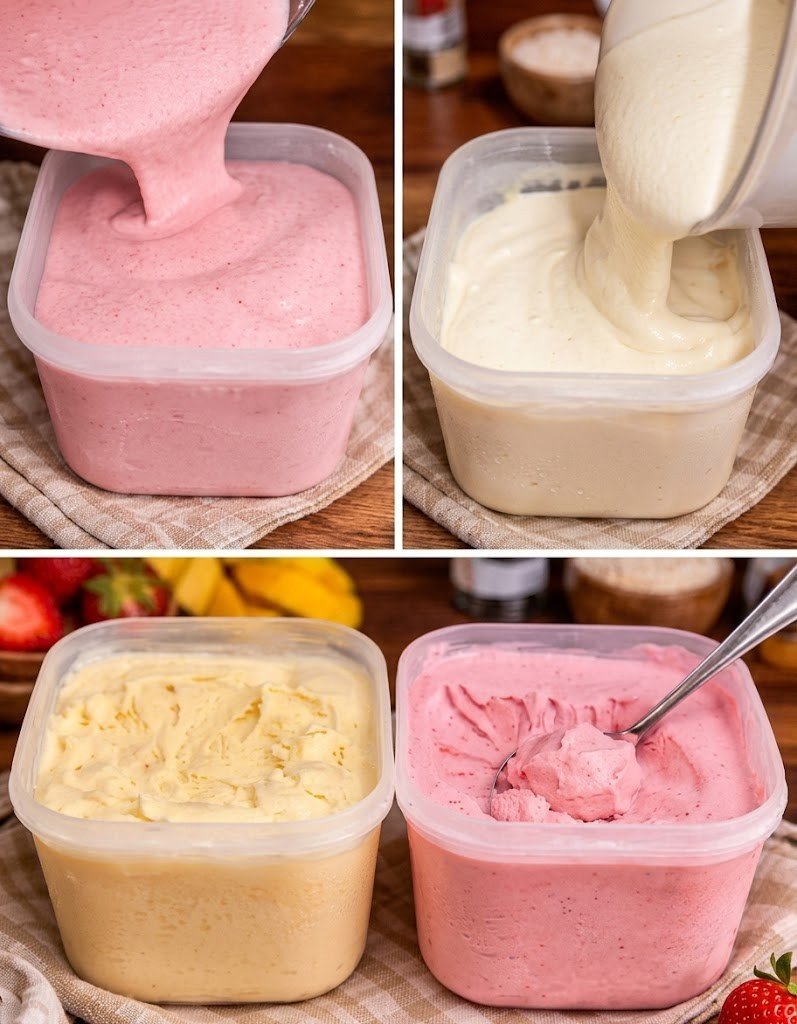
Strawberry / Mango Swirl: Blend 1 cup of fresh strawberries or mango chunks with a tablespoon of sugar until smooth. Layer the puree with the vanilla ice cream base in your container and use a butter knife to swirl it together before freezing.
-
Cookies & Cream: Gently fold 1 to 1.5 cups of coarsely crushed chocolate sandwich cookies (like Oreos) into the base before freezing.
-
Chocolate Lovers: Whisk 1/2 cup of unsweetened cocoa powder into the sweetened condensed milk base before folding in the whipped cream.
-
Salted Caramel Crunch: Swirl 1/2 cup of thick salted caramel sauce and 1/3 cup of chopped toasted pecans into the container just before placing it in the freezer.
Shelf Life & Storage Instructions
-
Freezer Duration: This homemade ice cream will maintain optimal texture and flavor for up to 2 to 3 weeks when properly sealed in an airtight container.
-
Preventing Freezer Burn: Always keep a layer of plastic wrap pressed directly onto the surface of the ice cream underneath the container’s lid. Avoid storing the ice cream in the freezer door, where temperature fluctuations occur every time the door opens.
-
Serving Tip: Because homemade no-churn ice cream doesn’t contain commercial stabilizers or preservatives, it can freeze quite firm. Let the container sit at room temperature for 5 to 10 minutes before scooping for the ultimate smooth texture.
Estimated Nutritional Information
Serving Size: 1/2 cup (approx. 100g) | Servings per Recipe: 8
-
Calories: 310 kcal
-
Total Fat: 22g
-
Saturated Fat: 14g
-
Trans Fat: 0.5g
-
-
Cholesterol: 75mg
-
Sodium: 70mg
-
Total Carbohydrates: 24g
-
Dietary Fiber: 0g
-
Total Sugars: 24g (Includes added sugars from condensed milk)
-
-
Protein: 5g
-
Calcium: 150mg
-
Vitamin A: 750 IU