-
Prep Time: 15 minutes
-
Chilling/Setting Time: 30 minutes (optional, for best texture)
-
Total Time: 15–45 minutes
-
Intensity Level: Low / Beginner-Friendly (Requires basic electric mixer or food processor handling)
Ingredients
To achieve that signature velvety, cheesecake-like fluff without excess heavy fats, this recipe utilizes high-protein dairy bases, natural fruit, and a touch of wholesome sweetness.
-
Protein & Dairy Base:
-
2 cups non-fat or low-fat plain Greek yogurt (acts as the creamy, tangy cheesecake foundation)
-
1 container (8 oz) light or fat-free cream cheese, softened to room temperature
-
2 scoops (approx. 60g) high-quality vanilla whey or plant-based protein powder
-
-
Sweetener & Flavor:
-
1/4 cup powdered sweetener (such as erythritol, monk fruit, or powdered sugar), adjusted to taste
-
1 teaspoon pure vanilla extract
-
-
Fruit & Mix-Ins:
-
2 cups fresh strawberries, washed, hulled, and finely diced (plus extra sliced strawberries for topping)
-
-
Matcha Element:
-
1.5 tablespoons ceremonial or culinary-grade matcha green tea powder (dissolved in 1 tablespoon of warm water to form a smooth paste)
-
Step-by-Step Instructions
Step 1: Whip the Cheesecake Base
-
In a large mixing bowl, combine the softened light cream cheese, Greek yogurt, vanilla extract, and your chosen powdered sweetener.
-
Using an electric hand mixer on medium speed, beat the mixture for 2 to 3 minutes until completely smooth, light, and free of any lumps. The texture should resemble a rich, whipped frosting.
Step 2: Incorporate the Protein Powder
-
Gradually add the vanilla whey or plant-based protein powder into the cream cheese mixture.
-
Mix on low speed just until fully incorporated. Do not overmix, as protein powder can sometimes alter the texture if overworked. Taste the base and adjust sweetness if desired.
Step 3: Divide and Flavor (Strawberry & Matcha Layers)
-
Divide the fluffy cheesecake mixture evenly into two bowls.
-
For the Strawberry Base: Fold the finely diced fresh strawberries gently into the first bowl until evenly distributed throughout the pink-hued fluff.
-
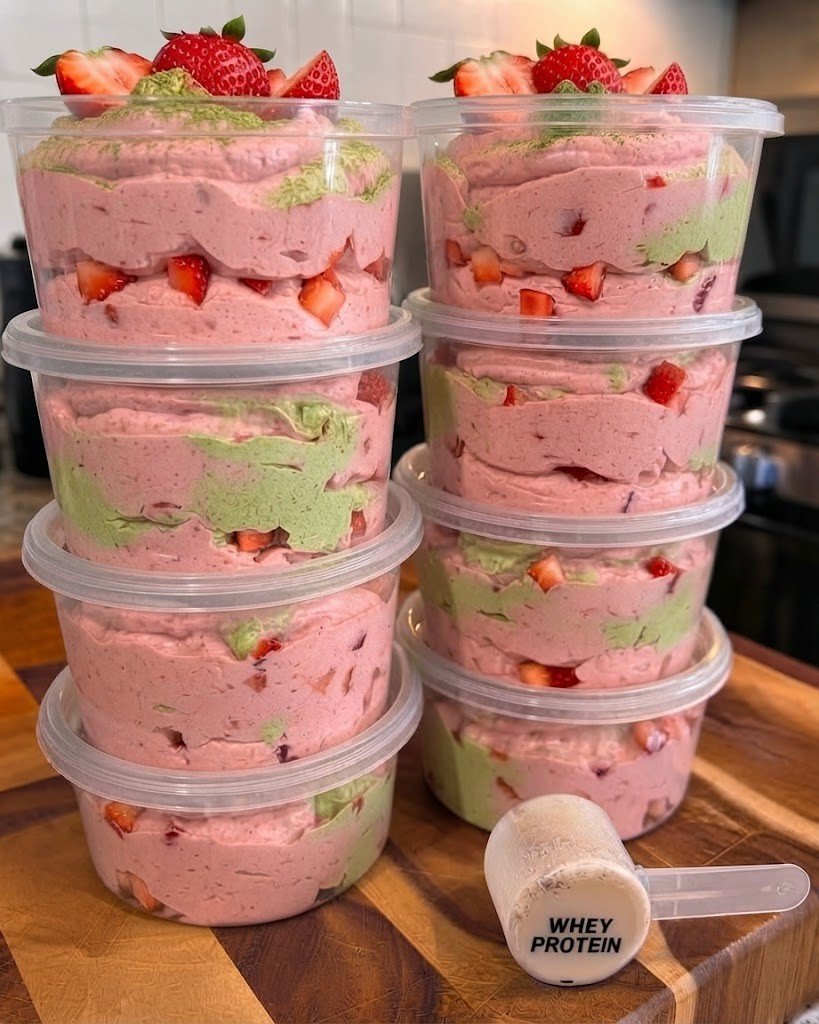
For the Matcha Base: Pour your prepared matcha paste into the second bowl and gently fold it in until a gorgeous, vibrant green marbled effect is achieved.
Step 4: Layer in Meal-Prep Containers
-
Grab clean, clear plastic meal-prep containers or mason jars.
-
Spoon alternating layers of the strawberry cheesecake fluff and the matcha cheesecake fluff into the containers to create a stunning, colorful presentation that highlights the contrasting layers.
-
Press a few pieces of diced strawberries against the sides of the containers for an extra pop of visual appeal.
Step 5: Garnish, Chill, and Serve
-
Top each container with fresh strawberry slices and a light dusting of sifted matcha powder.
-
Seal the containers tightly and place them in the refrigerator for at least 30 minutes to firm up into a decadent, mousse-like consistency.
-
Enjoy straight from the fridge whenever a sweet craving strikes!
Pro-Tips for Culinary Success
-
Softened Cream Cheese is Crucial: Ensure your cream cheese is completely at room temperature before beating. Cold cream cheese will cause stubborn lumps in your fluff.
-
Matcha Quality Matters: Use a vibrant, bright green culinary or ceremonial grade matcha. Dull or brownish matcha will yield a bitter flavor and an unappealing color.
-
Storage: These meal-prep fluff cups can be stored safely in an airtight container in the refrigerator for up to 4 to 5 days, making them the ultimate grab-and-go healthy dessert.
Nutritional Information
Note: Nutritional values are approximate estimates calculated per serving (assuming 1 of 8 total servings).
-
Calories: 145 kcal
-
Total Fat: 3.5g
-
Saturated Fat: 2.0g
-
-
Cholesterol: 15mg
-
Sodium: 110mg
-
Total Carbohydrates: 12.0g
-
Dietary Fiber: 2.0g
-
Sugars: 7.5g
-
-
Protein: 16.5g