- Preparation intensity: Medium
- Kneading intensity: Low to Medium (mostly folding)
- Fermentation intensity: Low effort, high patience
- Baking intensity: Medium (requires attention to temperature and timing)
Total Time Required
- Starter preparation: already active (assumed 5–7 days old)
- Autolyse: 1 hour
- Bulk fermentation: 4–6 hours
- Shaping and resting: 30–60 minutes
- Cold fermentation: 8–16 hours
- Baking time: 40–45 minutes
- Cooling time: 1–2 hours
Ingredients
- 500g bread flour (high protein recommended)
- 350g water (room temperature)
- 100g active sourdough starter
- 10g salt
Optional:
- Rice flour for dusting
- Seeds (sesame, flax, sunflower)
- Whole wheat flour substitute (up to 20%)
Step 1: Preparing the Dough (Autolyse Stage)
Time: 1 hour
Intensity: Low
In a large mixing bowl, combine 500g bread flour with 350g water. Mix until no dry flour remains. The dough will look rough and shaggy at this stage.
Cover the bowl with a damp cloth or plastic wrap and let it rest for 1 hour. This process is called autolyse, and it helps the flour absorb water, strengthens gluten formation, and makes the dough easier to work with later.
Step 2: Adding Starter and Salt
Time: 10–15 minutes mixing + rest begins
Intensity: Medium
After autolyse, add 100g active sourdough starter to the dough. Mix it thoroughly using your hands by pinching and folding the dough until the starter is fully incorporated.
Then add 10g salt. Continue mixing until the dough becomes smoother and more elastic. This may take about 5–10 minutes of hand mixing.
Cover the dough again and let it rest for bulk fermentation.
Step 3: Bulk Fermentation (Main Rise)
Time: 4–6 hours
Intensity: Low (but requires periodic folding)
During bulk fermentation, the dough will rise and develop flavor and structure. Keep it at room temperature (24–28°C ideal).
Every 30–45 minutes during the first 2–3 hours, perform a set of stretch and folds:
- Wet your hands slightly
- Pull one side of the dough upward
- Fold it over itself
- Rotate bowl and repeat 4 times
Do this process 3–4 times total.
You will notice the dough becoming smoother, stronger, and more elastic. At the end of bulk fermentation, it should increase in size by about 50–70%, not necessarily double.
Step 4: Pre-Shaping
Time: 20 minutes rest after shaping
Intensity: Medium
Lightly flour your work surface. Gently remove the dough and shape it into a loose round ball. Do not deflate it too aggressively; the goal is to build surface tension.
Let it rest uncovered for 20 minutes. This allows the gluten to relax before final shaping.
Step 5: Final Shaping
Time: 10–15 minutes
Intensity: Medium
Shape the dough into its final form (round boule or oval batard). To do this:
- Fold edges toward the center
- Flip the dough seam-side down
- Rotate and tighten using gentle dragging motion
Place the shaped dough into a floured proofing basket or bowl lined with a cloth.
Dust lightly with rice flour to prevent sticking.
Step 6: Cold Fermentation (Proofing)
Time: 8–16 hours (overnight recommended)
Intensity: Low
Cover the dough and place it in the refrigerator. This slow fermentation stage develops deep flavor and improves crust quality.
The cold temperature slows yeast activity while allowing bacteria to enhance sourness and aroma.
Step 7: Baking Preparation
Time: 30 minutes preheat + setup
Intensity: Medium
Preheat your oven to 250°C (480°F). Place a Dutch oven or heavy baking pot inside to heat up.
When ready to bake:
- Remove dough from fridge
- Flip onto parchment paper
- Score the top using a sharp blade or razor
- Carefully transfer into hot Dutch oven
Step 8: Baking
Time: 40–45 minutes total
Intensity: Medium
Bake covered for 20 minutes at 250°C. This traps steam and allows the bread to rise fully.
Then remove the lid and bake for another 20–25 minutes until the crust becomes deep golden brown.
For a thicker crust, extend baking by 5 minutes uncovered.
Step 9: Cooling
Time: 1–2 hours
Intensity: Low but important
Remove bread from oven and place it on a wire rack. Do not slice immediately.
Cooling allows the internal crumb structure to set. Cutting too early can result in gummy texture.
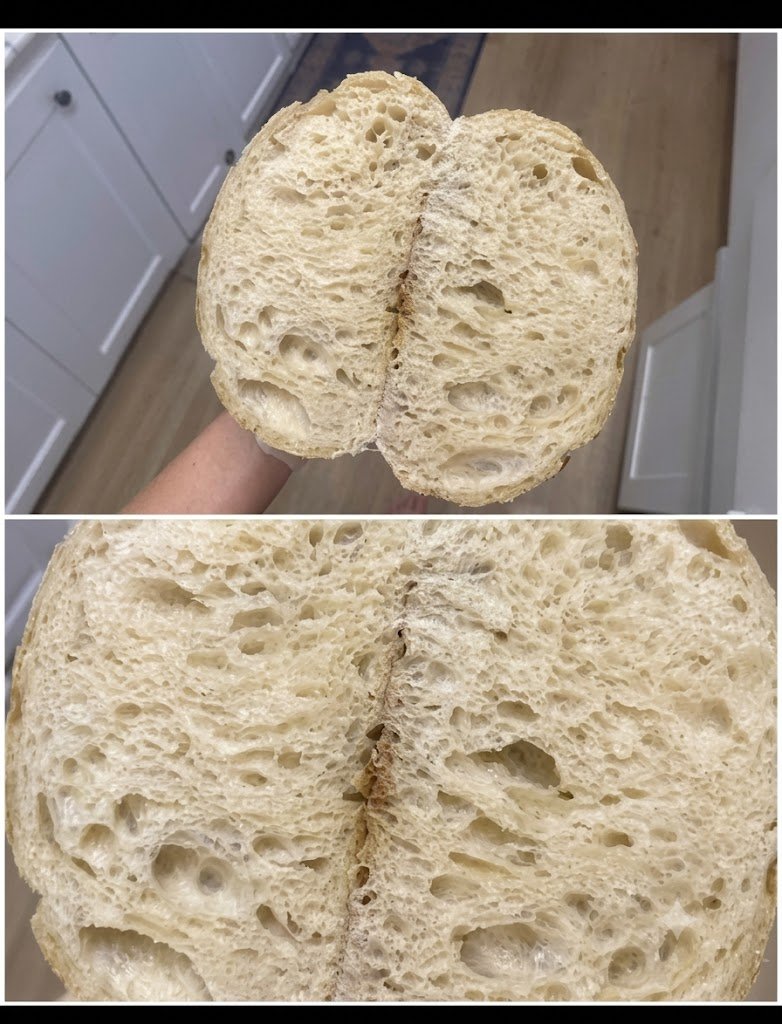
Texture and Flavor Profile
The finished sourdough bread should have:
- Crisp, caramelized crust
- Airy but chewy interior (open crumb)
- Slightly tangy flavor
- Nutty aroma from fermentation
The longer fermentation contributes to a more complex taste and better digestibility.
Nutrition Information (per 100g approx.)
- Calories: 240 kcal
- Carbohydrates: 47g
- Protein: 8g
- Fat: 1g
- Fiber: 2g
- Sugar: 0.5g
- Sodium: 400mg (varies based on salt use)